Monday, December 28, 2009

Chocolate Chip Hazelnut Cookies


You can never have enough cookie recipes in your arsenal. I love the all-American Chocolate Chip Cookie, but sometimes they can become boring. This is a fun variation on the classic Chocolate Chip Cookie. The addition of ground hazelnuts gives this chewy cookie a Praline-like character. They are so good, that I bet that you can't eat just one!

Chocolate Chip Hazelnut Cookies
Makes 3 dozen cookies
  • 1 1/2 sticks unsalted butter
  • 1 cup light brown sugar
  • 1/2 cup granulated sugar
  • 2 large eggs
  • 1 teaspoon vanilla extract
  • 1 1/4 cups unbleached all-purpose flour
  • 1 cup hazelnut flour
  • 1/2 teaspoon baking powder
  • 1/2 teaspoon fine sea salt
  • 2 cups best quality semisweet chocolate chips
Position oven racks to center of oven. Preheat oven to 350 degrees. Line 3 baking sheets with parchment paper or use Silpats.

Mix flour, hazelnut flour, baking powder, and salt together using a whisk.

Using a mixer, cream butter and sugars together until light and fluffy. Scrape sides and bottom of the bowl. Add eggs 1 at a time and beat in thoroughly. Add the vanilla, mix in, and scrape the bowl again.

Add flour mixture and blend on low until just incorporated. Add the chocolate chips and blend until they are well distributed. Allow dough to rest in the refrigerator for at least 2 hours, or overnight.

After dough has rested, scoop out 1/4 cup portions, roll into a ball, then divide the ball in half. Place each half on prepared baking pans until you have 12 cookies per pan. Bake for 14 to 15 minutes. For best results, bake only 1 pan at a time. When finished, remove cookies to a cooling rack. Best served warm, but these cookies will keep for a week in a covered container.

Wednesday, December 9, 2009

Heavenly Challah


Challah is a most wonderful bread! Not only is it used by Jewish People in their weekly Sabbath Ritual, it also makes the world's best French Toast! The rich egg dough is very Brioche-like, but not quite as delicate. It is also easier to make. There are many recipes for Challah. Some use dairy products, some do not. Since Challah is part of the Sabbath Dinner, where typically meat is served, it is traditional to make a Challah that is dairy free. This is in keeping with the Biblical command to not mix meat and milk. Also, it is customary to make 2 loaves of Challah to symbolize the double portion of Manna that the Israelites gathered in the desert prior to the Sabbath, as no work was to be done on the Sabbath. Modern Challah, which bears little resemblance to Manna, is actually an adaptation of a rich, braided, egg-laden, Central European/German Bread that is a relative of Brioche. The Ashkenazic Jews of this area adapted it as their Sabbath loaf because of its fine richness - a far cry from their heavy, rustic, daily loaves.

Challah
Makes 2 large loaves

  • 6 1/2 to 7 cups all-purpose flour
  • 1 tablespoon active dry yeast
  • 1 1/2 cups warm water
  • 4 large eggs, at room temperature
  • 1/3 cup sugar
  • 2 tablespoons honey
  • scant 1/2 cup neutral flavored oil (such as canola)
  • 2 1/2 teaspoons kosher salt

In the bowl of a standing mixer, combine 2 cups of the flour, the yeast, and the warm water. Mix together until all of the flour is moistened. Cover and let the yeast proof in a warm place for 1 hour. After 1 hour, the flour mixture should be active and bubbly. This is the starter sponge. While the sponge is forming, lightly oil a baking sheet and put aside.

Add all of remaining ingredients to the sponge, except the remaining flour, and begin mixing with the dough hook attachment. Once the mixture begins to come together, begin adding flour until a smooth dough is formed that does not stick to the bowl. You may not need all of the flour, but you will probably need most of it. Once the dough begins to pull away from the bowl, increase the mixer speed until the dough begins to slap against the sides of the bowl. If the dough begins to stick at all, add more flour 1 tablespoon at a time. You want the dough to be a cohesive whole that freely moves around the bowl, slapping loudly. Knead in this manor for 15 minutes. (Your mixer will get hot, so don't worry. Also, you will want to hold on to the mixer during this process so that it does not "walk" off the counter!)

After 15 minutes, cover the dough, and allow to rest in a warm place for at least 2 hours. After 2 hours, place dough an a very lightly floured surface and divide into 8 equal portions. Roll each of the 8 portions into thick "snakes" about 10 inches long. Each loaf will be made of 4 of these "snakes".

To Braid The Challah:
1 2 3 4
Line up 4 of the dough "snakes" in a row like this, llll. Begin braiding in the middle by placing piece 4 over piece 3. Then, place piece 2 over piece 4. Finally place piece 1 UNDER piece 4. Repeat. Continue in this manor until you reach the end. Then, gather all of the ends together and tuck them under the loaf. Flip loaf around, and repeat exactly on the other side until you reach the other end. Again, tuck the gathered ends under the loaf. Transfer braided loaf to prepared baking pan. Braid second loaf, and place on same pan, leaving enough room for the challah to rise. Cover loosely with plastic wrap, leave in a warm place, and allow to rise for 2 1/2 to 3 hours. Begin preheating oven to 350 degrees.

Before the loaves are baked , you must egg wash them to give a shiny appearance. You will need:
  • 1 egg
  • 1 teaspoon water
  • sesame or poppy seeds, optional

Whisk egg and water together thoroughly. Gently brush loaves with egg wash, being careful to cover all exposed surfaces without allowing egg to pool on baking sheet around loaves. Sprinkle with seed garnish if desired.

Bake in middle of preheated oven for 40 to 45 minutes. When fully baked, Challah will sound hollow when thumped on the bottom, and will be a rich mahogany brown color.

Remove immediately from baking pan and allow to cool completely on a wire cooling rack.
Best enjoyed fresh (of course), but it will keep for 1 week if wrapped tightly.

Monday, November 23, 2009

Spiced Pumpkin Madeleines


Wow! What a time of transition it has been! Sorry that I have been away for a while, but there have been many changes going on at Beyond The Kitchen Wall. The biggest change was moving from the Estate in Glencoe, Illinois to a temporary house in Wilmette, Illinois. It was hard to leave my Kitchen and Garden behind, but that's life... I also managed to squeeze a fantastic honeymoon to Paris in there as well. It was great to return to the City of Lights after many years. Paris is magical and renewed my passions for French Cuisine and the French People.

That being said, it is time to get back to business. And my business is FOOD! I have been working on many recipes in my absence and hope to share them with you in the coming weeks.

We are at the threshold of the Holiday Season, Thanksgiving is this Thursday in the U.S. I wanted to share a recipe that features an ingredient that figures very prominently in the Thanksgiving celebration and during the Holiday Season as a whole, namely Pumpkin. I love pumpkin and am a die hard pumpkin pie fan, but there are other things that you can do with this ingredient. One of my favorite new recipes is for Spiced Pumpkin Madeleines. It is a very French way to use an all-American ingredient.

These "cookies" are incredibly easy to prepare because I use good old canned pumpkin puree. Their texture is pure madeleine, crispy on the outside and cakey-soft on the inside. Also, like true madeleines, this texture is fleeting. They are at their zenith of perfection while still warm from the oven. They begin to decline quickly, and should be consumed the same day that they are prepared. After a day, they become soft and "wet"/sticky. They still taste great, but they lack the hallmark madeleine texture. This really should not be a problem though, because they are so good that they won't be around that long!

Spiced Pumpkin Madeleines
Makes about 2 1/2 dozen
  • 4 large eggs, separated
  • 1 1/4 cups granulated sugar
  • 1 cup canned pumpkin puree
  • 1 tablespoon Madagascar vanilla extract
  • 3/4 cups cake flour
  • 1/4 cup all-purpose flour
  • 1/2 teaspoon fine sea salt
  • 1/2 teaspoon cinnamon
  • 1/4 teaspoon nutmeg
  • 1 stick (4 ounces) unsalted butter, browned
In a small saucepan over medium-low heat begin to melt the butter. Once the butter melts, allow it to gently cook until it begins to turn a light brown color. Immediately turn off heat and allow butter to sit. It will continue to brown as it rests. If your butter gets too dark, start over.

Place the egg yolks in the bowl of a mixer along with half of the sugar. Beat on high speed until sugar melts and yolks become a pale yellow. Add pumpkin puree and vanilla and beat on low until just mixed together.

Place egg whites in a separate mixer bowl and beat on high speed until they reach soft peaks. Add remaining sugar and continue beating until egg whites are stiff and glossy.

In a separate bowl, whisk together the flours, salt, and spices.

Whisk 1/3 of the egg whites into the pumpkin mixture to lighten the batter. Then in 2 batches, gently fold in remaining egg whites using a large rubber spatula. Sprinkle flour mixture gently over the top of the batter and fold until combined. Be sure that there are no pockets of flour at the bottom of the bowl. Finally, add 6 tablespoons of the reserved brown butter, reserving 2 tablespoons to grease the madeleine pan. Cover batter and allow to rest in the refrigerator for at least 4 hours.

To bake:

Preheat oven to 375 degrees and place oven rack in middle position. Lightly butter a madeleine pan with the reserved brown butter. Be sure that no butter pools in the bottom of the shells as this will distort the final appearance. Place 1 1/2 - 2 tablespoons of batter in each shell mold. I find that a small portion scooper works best for this. Place in hot oven and bake for 14 to 15 minutes. Remove from oven and invert madeleines onto a cooling rack. If they stick, just bang a corner of the pan on the rack and they will come right out. Allow to cool to warm and serve immediately. They may be kept for 1 day, uncovered.

Sunday, September 13, 2009

Raspberry, Litchi, and Rose Water Sorbet


Have you heard of the enchanting flavor called Ispahan? It is an exotic blend of raspberry, litchi, and rose. This flavor was invented/discovered by Master Pastry Chef, Pierre Herme. If you have not yet tried Ispahan, a whole new flavor world awaits you! Words cannot describe the other-worldliness of this flavor. It is like some sort of Heavenly perfume that dances upon your palate and leaves you longing for more.

I was first introduced to this flavor at the French Pastry School in Chicago, while attending a reception for Chef Herme. From the moment that I tasted it, I was hooked. I ate more Ispahan macaroons that evening than I care to admit. The flavor was so haunting, so soulful, so elegant, so SEXY, that it became imprinted on my psyche! All things Ispahan became my quest. I studied the flavor, researched its name and origin. As it turns out, it is named after the Ispahan Rose. There is also a city in Persia/Iran called Ispahan. This is very fitting for a flavor that transports you to a far-off, mysterious place!

The 19th century poet, Thomas Bailey Aldrich captured the flavorful mystique of Ispahan in his classic verse:

When the Sultan Goes to Ispahan

When the Sultan, Shah-Zaman

Goes to the city Ispahan,

Even before he gets so far

As the place where the clustered palm-trees are,

At the last of the thirty palace-gates

The pet of the harem, Rose-in-Bloom,

Orders a feast in his favorite room--

Glittering square of colored ice,

Sweetened with syrup, tinctured with spice,

Creams, and cordials, and sugared dates,

Syrian apples, Othmanee quinces,

Limes and citrons and apricots,

And wines that are known to Eastern princes.


The simplest way to experience Ispahan is to make the following sorbet recipe. It is very simple, but it lets the pure, clean flavors of the ingredients shine through. This is my recipe. It is my Homage to Pierre Herme. It is a humble tribute to one of my Culinary Heroes.

This sorbet is great on its own, served as an Intermezzo, or as a compliment to Middle Eastern and Persian Desserts. If sorbet can be sexy, this definitely fits the bill!

Raspberry, Litchi, and Rose Water Sorbet
(Sorbet Ispahan)
Makes slightly more than 1 Quart
  • 8 ounces fresh raspberries, or frozen raspberry puree
  • 8 ounces fresh litchi pulp, or frozen litchi puree
  • 12 ounces granulated sugar
  • 2 cups water
  • 1 tablespoon rose water**
  • 1 tablespoon lemon juice
  • pinch of salt
Place fresh fruits or purees, sugar, and 1 cup water in a blender. Blend on high for 1 minute. Pour blended fruit through a fine strainer to remove seeds and large solids. Press on residue in the strainer to extract as much liquid as possible. Add remaining ingredients to strained fruit, mix thoroughly, cover, and chill overnight. This allows the flavors to marry perfectly. The next day, pour sorbet base into an ice cream freezer and spin for 20 to 30 minutes. Once frozen, transfer to a quart container (there will be extra for you to try!!!). Allow to cure in the freezer 2 to 4 hours. That's it!

** Rose Water can be found at Whole Foods Market, in Middle Eastern stores, or is available online from the Spice House.

Sunday, August 30, 2009

Saucisse de Toulouse


Here is my recipe for Toulouse Sausages. These are simple, all-purpose French sausages that can be used in a variety of dishes, but most notably, Cassoulet de Toulouse. Since we are on the verge of Cassoulet season, I thought it fitting to insure that a fresh supply of sausages was on hand. These sausages are lightly flavored with white wine, garlic, nutmeg, coriander, allspice, thyme, and savory. They can be used in any recipe calling for a fresh garlic sausage. They are also great grilled and served with plenty of crusty bread and Moutarde Violette.


Saucisse de Toulouse
Makes about 20 sausages

  • 3 pounds of fairly lean pork shoulder, cut into 1 inch pieces and well chilled
  • 1 pound of pork fatback, cut into 1 inch pieces and well chilled
  • 1 teaspoon nutmeg, freshly grated
  • 1 teaspoon coriander, ground
  • 1 teaspoon thyme, dried
  • 1/2 teaspoon allspice, ground
  • 1/2 teaspoon savory, dried
  • 2 garlic cloves, creamed (optional)
  • 1 cup white wine, I prefer Sauvignon Blanc
  • 1 1/2 tablespoons Kosher salt
  • 2 teaspoons black pepper, freshly ground
  • 12 feet of hog casings, rinsed thoroughly**

Using a meat grinder, coarsely grind the pork shoulder and fatback together. Use the die with the large holes, or a die specifically for sausage-making. After meat and fat are ground, add all of the remaining ingredients except for the hog casings. Mix thoroughly in a large bowl with your hands until well combined. Cover seasoned sausage mix with plastic and refrigerate overnight. The next day, cook a small patty of sausage mix to check seasoning. If you feel that the sausage needs more salt or any other seasoning, add it now.

Cut the rinsed sausage casings into 3 foot lengths. This will make it easier to work with. Carefully thread a length of casing onto a sausage filler tube. When the end is reached, tie a knot. Carefully begin to stuff the casings, being careful not to over-stuff. If you over-stuff the casings, they will burst. Also, be careful not to have large air bubbles in the casing. The sausage mix should be packed semi-firmly, and look full. This will take some practice, but this really is the fun part. If the casing bursts, or if you notice a hole, stop at that point. Empty the casing enough to tie it off.


Continue this procedure until all of the sausage mix has been stuffed into casings. Remember to leave yourself enough room at the end of a length of casing to tie a knot. The casings are slippery, so this part can become quite comical! Once all of your casings have been tied off, you are ready to twist the casings to form individual sausages. Be very gentle! This is where trouble can quickly set in. Measure off 6 to 8 inches, gently pinch the sausage, and twist a couple of turns. If your casings are too full, this added pressure will cause them to fail. If this happens, never fear, just stuff any left over casings (you will have left overs).

Once individual sausages are formed, they can be used immediately, or carefully wrapped and frozen for three months.

** This large amount of hog casings will give you more than enough to work with. Luckily, hog casings are inexpensive, and it is better to have too much rather than not enough. It is guaranteed that some will break until you become accustomed with the stuffing procedure. Don't worry, just keep trying. After all, it is an art!

Thursday, August 27, 2009

Moutarde Violette

This is my new must-have ingredient! It is the famous Moutarde Violette de Brive. It is mustard made with grape must. Made since the Fourteenth Century, this style of mustard can be traced back to ancient times. In fact, our word mustard comes from the Latin word mustum, which means grape must. Famous in the Limousin region of Southwestern France, Moutarde Violette is the perfect condiment for duck, pates, sausages, beef, and really just about any other place that you would want to use mustard! Its flavor is sweet and delicate with a haunting hint of spice. It is available in two styles, whole grain and smooth. Makes a great base for sauces and vinaigrettes. In the United States, it is available online from Zingerman's (whole grain, search for Violet Mustard), La Cuisine (smooth, search for Purple Mustard), and other sources. Sometimes, due to U.S. labeling laws, it is referred to as "Purple Condiment". In France or the rest of Europe, you can order it from Bien Manger (smooth, search for Moutarde Violette).

Sunday, August 16, 2009

Ragout Forestiere : Wild Mushroom Ragout

With my new-found love of mycology, I just can't seem to get enough mushrooms in my life. Since we are at the height of Chanterelle Mushroom Season, I developed this recipe to pay homage to one of my favorite fungi. This is an elegant combination of some of nature's greatest treasures, Chanterelle and Lobster Mushrooms, along with our Poached Summer Truffles. This Ragout can be served as its own course, or as a side to meat, poultry, or fish.

Ragout Forestiere
Serves 6 to 8

  • 2 tablespoons unsalted butter
  • 3 small shallots, minced
  • 7 ounces Chanterelle Mushrooms, cleaned**, and cut in half, small mushrooms left whole
  • 7 ounces Lobster Mushrooms, cleaned**, and cut into large pieces
  • 2 Summer Truffles, diced large
  • 1/4 cup dry white wine, I prefer a Sauvignon Blanc
  • 1/4 cup truffle poaching liquid
  • 1/4 cup heavy cream
  • 3 sprigs fresh French Thyme, leaves only
  • 2 tablespoons flat-leaf parsley, chopped
  • salt and pepper to taste
Melt butter in a large pan over medium-high heat. When butter just begins to brown, add the shallots and saute until translucent. Add both mushrooms and the truffles, and saute until the mushrooms just begin to brown around the edges. Do NOT shake the pan or stir the mushrooms around too much as this will cool down the pan and cause your mushrooms to stew. When the mushrooms begin to brown, add the wine and reduce until the pan is almost dry. Add the poaching liquid and reduce until the pan is almost dry. Add the cream, thyme, and parsley. Stir to just combine, and season with salt and pepper. Cook together for 3 more minutes, and serve immediately.

** To clean the mushrooms, wipe off with a damp cloth. If the mushrooms are very dirty, quickly run them under running water. Pat dry before cooking.

Friday, August 14, 2009

BTKW Chef's Garden 2009 Update

Picking cucumbers on a beautiful morning

The harvest continues! Everything is doing well except for the bush beans, beets, and fennel; all of which succumbed to the well-fed rabbits! They are smarter than they look! I did get some of these vegetables, but they were underdeveloped due to constantly having their leaves eaten. Such is life!

The corn has come in, sweet and tender. The pickling cucumbers are also abundant. I have already made one batch of Refrigerator Kosher Dill Pickles. I will share the recipe soon. Herbs are still abundant. The cilantro is going to seed, and is providing me with intensely flavorful green coriander. Squashes are starting to come in, and the tomatoes are FINALLY heavy with fruit. I should be up to my eyeballs in tomatoes in the next 2 weeks! Tomato canning in my near future! Peppers are still small, but coming around. Better luck next year.

Sunday, August 9, 2009

Remembering Julia Child


With all the hoopla surrounding the release of the new movie "Julie & Julia", I thought it only fitting to jump on the Blogger Bandwagon with my two cents. Wouldn't want my blog to miss any Google hits. I guess this makes me guilty of using Julia's name and reputation to get ahead, something she would have frowned upon. But hey, everybody is doing it, so that makes it alright, n'est-ce pas?

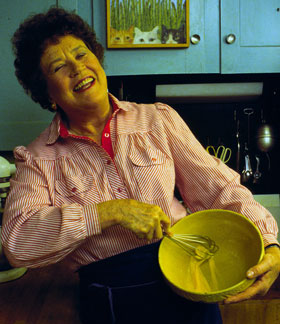
Don't get me wrong, I am a HUGE Julia Child fan. She has been my hero since I was a small child. I remember watching the French Chef series in the mornings along with Sesame Street and Mr. Rodger's Neighborhood back in the early 70's. I firmly believe that she is responsible for my love affair with fine food. She inspired me to cook, and to become a Chef. She taught me to be an undying Francophile, as she was. I love her, and I always will. I am thrilled that they actually made a movie about her. I saw the movie, and I absolutely loved it! But I love all things Julia. I always have. She deserves this recognition because she completely changed the way that Americans ate. Notice that I say ATE, not EAT. All of the great progress that Julia inspired in the 60's and 70's has been undermined by the glut of corporate/fast food/Food Network crap of the 80's, 90's, and 2000's. But I'm getting ahead of myself...

Julia Child was a Purist. She believed in good, honest hard work, and everything in moderation. She loved food, and she loved French food most of all. She is the perfect anti-hero for today. She did not peak at 25 years old and make millions by selling out. She did not even learn to cook until she was 37 years old (practically dead by today's standards). She was not youthful, she was not glamorous or graceful, she didn't have a great TV personality, but she had passion and the courage of her convictions. This is sadly the one quality that is missing from today's "Stars". There is no passion for food, only sales and competition. Julia would be absolutely mortified at what the "Celebrity Chef" has degenerated into, a cheap pitch person for merchandise. A talking head with absolutely no food sense whatsoever. She would be shocked to see Gordon Ramsey risk Michelin Stars for ratings.

Julia never lent her name to any merchandise, only her books and television series. Julia never lent her name or endorsements to other cookbooks. She did not want to have her name exploited by the mass media marketing machine. She knew the dangers of allowing money mongers to get their cold, corporate hands on her art. She was a true artist, living only to cook her beloved French Cuisine for her beloved husband, and for us. A true gift.

According to Sarah Moulton, who was lucky enough to be mentored by Julia Child, Julia absolutely HATED the Julie/Julia Blog. She thought it was gimmicky and exploited her name and reputation. This was the attitude that Julia had towards most people that tried to pay her homage. She wanted none of it. She wasn't a saint, she was a teacher. She worked hard and wanted others to work hard too. There was no time for platitudes, only food. And make that French food, thank-you! The greatest food of all!

Yes, Julia Child loved La France. From the moment she tasted the Sole Meuniere at La Couronne in Rouen, she knew that she was home. She knew what her life's mission was - to teach Americans to adore the treasures of the French table. This is the Julia Child of my experience. The teacher absolutely brimming with all things French. As I watched her as a child, I knew that she spoke the truth. She made me want to be French, like she wanted to be French. Today I like to say : Je suis Americain, mais mon coeur et Francais (I am American, but my heart is French). This was how she felt. She loved America, but her heart and soul were French.

And it worked! America fell madly in love with this strange creature who wasn't afraid to give it her all. Her passion for La Cuisine Francaise was greater than her lack of perfection. She was like us, imperfectly human. When she dropped something, she picked it up and kept going. Fearless! She became so popular that she made the cover of Time Magazine's Thanksgiving issue in 1966.
Her passion continued for the rest of her life. She worked tirelessly to teach Americans the Art of French Cooking. She inspired a whole generation of new Chefs to cook from the heart. She changed the way that Americans ate. Besides winning many TV and literary awards, and an honorary doctorate from Harvard, Julia Child was also presented with the Legion of Honor by her beloved France in 1991. She was presented with the Medal of Freedom by the United States in 2003, the highest civilian honor.

So what happened? Why has our Food Culture degenerated to the point that there is a Panera on every corner, and a real bakery can't make it? Why as a nation do we consider going to the drive thru at McDonalds a suitable option to feed our children a "meal"? Why do we attempt to ban foie gras, but cigarettes are legal? Why is there E-coli on my Enoki mushrooms? Why are we considering legislation to make it illegal to criticize monster food conglomerates for their crimes against nature and humanity? What the hell is going on in this country?

We have become divorced from the notion that GOOD FOOD = PLEASURE!!!

We are so hung up on convenience that we have sold our health and the health of our children for our hectic schedules. We run around like idiots, from work, to school, to soccer practice, to activity after activity, but we don't stop to eat as a family. When we are finally at home together, we go off into our own isolated/electronic worlds: IPod, Texting, Cell Phone, Video Games, IPhone Apps, Web Surfing, etc... How many times do you have to tell your kids NOT to text at the dinner table? We are drifting apart as families and as a nation. The once strong bond of the dinner table has been replaced by grabbing a bucket of calorie laden "food" on the way from soccer practice to Hip Hop dance practice. It's nuts!

And the corporations are there to make it all possible. We have returned to the America that Julia Child faced when she was first starting out. The America of the Frozen Dinner. The America where having to be in the kitchen was seen as some kind of Draconian punishment. Only now it's worse because there are even more "choices". We can feed ourselves for very little money and very little time. Sounds great, but look at the consequences: obesity, diabetes in children, heart disease, cancer, cancer, cancer, sexually mature 8 year olds (from hormones), powerful new strains of E-coli, genetically modified organisms, irradiation, pollution, and Paula Deen - who is the spokesperson for
Smithfield Foods, one of the biggest polluters on EARTH!

Shame on you, Paula! Did you do any research at all, or do Y'ALL only care about money???

I think that America needs Julia Child, now more than ever! We need her to teach us again. We need to STOP and LISTEN. The release of Julie & Julia has the potential to introduce a whole new generation of young Americans to the Grande Dame of French Cuisine. When I went to the movie, the theatre was PACKED! I actually had to wait in a huge line because so many people wanted to see Julia again. I found it very encouraging. It's not too late, we can still get this right. We just need to turn off the Food Network and listen to someone who actually loved food!

I love you, Julia! You are my HERO. Thank-you for teaching me to love La Cuisine. I miss you.
Bon Appetite!

Sunday, August 2, 2009

French Walnut Vinaigrette


A staple of fine French cuisine, roasted walnut oil is the perfect compliment to summer salads. My favorite brand of walnut oil is made by La Tourangelle, a company that has been handcrafting fine oils for 150 years in Saumur, France. They also offer a wide array of other quality oils for all of your favorite recipes.

This is my variation on La Tourangelle's standard vinaigrette recipe. I like to add slightly more vinegar for a brighter flavor.

French Walnut Vinaigrette
  • 1/4 cup roasted walnut oil
  • 1 1/2 tablespoon cabernet sauvignon vinegar
  • 1 teaspoon Dijon mustard
  • salt and pepper to taste, I recommend 1/4 teaspoon of each
In a small bowl, whisk vinegar, mustard, salt**, and pepper together. Slowly drizzle in walnut oil, whisking thoroughly.

** Tip - Always add salt to the vinegar before adding the oil. Oil can prevent the salt from dissolving completely.

Tuesday, July 28, 2009

Farmers' Market Raspberry Pie


I love raspberry season! There is just something so special about the raspberry. It is delicate and elegant. It's flavor is sophisticated. It's no wonder that it is called the "King of Berries". When raspberries come straight from the farm, or are grown at home, they are even better. Something as delicate as a raspberry is only at its peak of freshness and flavor for a short time. Within hours of being picked, they begin to decline. Raspberries are very prone to mold. Once purchased, they should be used within 2 days, or preserved in some way.

After harvesting raspberries from my garden, or buying them from the farm, I get to work preserving them for future use. The berries that are not eaten fresh, or turned into sauces or jams are Individually Quick Frozen. This helps to maintain them at their peak for months.

My favorite thing to do with fresh raspberries is to turn them into pies. A raspberry pie is a special treat. The only problem is that it's hard to find a good recipe for raspberry pie. Raspberries contain a lot of water. As a result, most raspberry pies come out soupy. It is horribly anti-climactic to see all of your beautiful raspberry filling go running off the crust as you try to serve a piece of pie! I've been there, it's heartbreaking!

After many heartbreaks, I developed the following raspberry pie recipe. The key to this pie's success is arrowroot, and a lot of it. This results in a glossy, ruby-colored filling that stands up straight and tall when sliced. Also, the filling is not cooked before being added to the crust. As a result, the filling is loaded with whole, juicy raspberries, as illustrated by the picture below.


Raspberry Pie
  • 24 ounces (by weight) fresh or IQF raspberries
  • 3/4 cup granulated sugar
  • 1/3 cup arrowroot
  • 1/2 teaspoon sea salt
  • 1 teaspoon Tahitian vanilla
  • 1 flaky pie crust
Place oven racks to center position, and preheat oven to 375 degrees. Roll out pie crust and line a standard 9 inch, metal pie dish. Place lined pie dish in refrigerator and chill for 30 minutes. While dough is chilling, combine all other ingredients in a large bowl and GENTLY mix together using a large rubber spatula. Be careful not to break up the berries too much. After 30 minutes, GENTLY add filling to the crust, being sure that no arrowroot or sugar remains in the bowl. Level out filling, place pie dish on a baking sheet, and bake pie for 1 hour. Pie should be very bubbly, but be sure that the filling does not start to caramelize around the edges. Depending on your oven, you may need to bake the pie even longer. The key is to be sure that pie is bubbly in the middle. If crust begins to brown too quickly, reduce heat to 325 degrees. When pie is done, it will still be somewhat loose in the center. Remove pie from oven, cool on a rack for 1 hour, and then chill in the refrigerator for 6 hours. The filling will firm up as it chills.
At this point, this becomes a refrigerator pie. It should be stored in the refrigerator, not left out on the counter. It will get moldy! It is also incredibly refreshing when it is cold.

Sunday, July 26, 2009

Mushroom Foraging in Maine


At the beginning of July, I was fortunate enough to travel with my boss to his summer home in Bar Harbor, Maine. Bar Harbor is located on beautiful Mt. Desert Island, just off the Down East coast of Maine. It's an enchanting location. Not only is there the rugged Maine coastline to explore, but there is also Acadia National Park with its pristine beauty.

One day, after I had my fill of lobster, seafood, and blueberries, I was walking along an oceanside path on the property. As I was walking along absorbing the natural beauty of the location, I noticed something strange out of the corner of my eye. In amongst the green and earthy colored underbrush, I saw a golden patch of yellow. It seemed so out of place to me that I had to leave the path and see what it was.

Wild Chanterelle Mushrooms that I saw from the path.

To my absolute amazement, I came upon a rocky outcrop teaming with beautiful wild mushrooms. They seemed familiar. "Oh my G-d, I think those are wild Chanterelles!!!" I shouted to the trees. "They must be Chanterelles!" I thought to myself. Being a professional Chef with an undying love affair with French Cuisine, I have seen thousands of Chanterelle mushrooms. I knew in my heart that these were the real thing, but being from Chicago, I had absolutely no experience identifying wild mushrooms. The last thing I wanted to do was to poison myself or anyone else by misidentifying a mushroom! I decided to pick one and try to find someone who could help me to positively identify it.

Close up shot of Wild Chanterelle Mushrooms.

To my dismay, there was no one on Mt. Desert Island who could help me! I was shocked. Here I was in outdoorsman's paradise, and there wasn't a place for me to bring foraged mushrooms for identification. In Europe, you can bring wild mushrooms to the local pharmacy to be identified. There was no such service to be found. So I kept my little mushroom wrapped in a moist paper towel in the mini bar fridge in my hotel room. I decided that I would try to find some sort of mushroom identifying aid at the local book store. The only problem was that I didn't have time to do it at that moment.

Chanterelle Mushroom on the forest floor.

When I went to work, I told everyone about the mushroom that I had found, and how I thought that it was a wild Chanterelle, and that I couldn't find anyone to help me to identify it, BUT I KNEW THAT I WAS RIGHT! And, I found that when you start talking to people about some wild mushroom that you found, and that you actually picked it, they get VERY concerned. It is amazing how afraid people are of mushrooms. I don't blame them, a misidentification can be deadly. I thought of my own misgivings. If I was so sure, would I be willing to eat the mushroom I picked? I had to admit that without more proof, I WOULD NOT.

Large Chanterelle growing along the road.

A couple of days passed. I started to explore the grounds around the house and found that these golden-yellow mushrooms were growing in several locations. When I would go jogging in the mornings, I would see them growing in certain places along my route. These things were everywhere!
That evening, my boss' mother gave me a present, a National Audubon Society Field Guide to North American Mushrooms. Finally, I would get my answer.

Chanterelle Mushrooms.

I was right! What I had found were indeed wild Chanterelle mushrooms, a Chef's dream come true! The last hurdle in the process was to actually eat my mushroom. I did it! It was raw, it was dirty, it was delicious! From that moment on, I was hooked on foraging for wild mushrooms. There is still a lot to learn, but I now know a wild Chanterelle when I see it!

More Chanterelle Mushrooms.

Pretty soon, I started to notice different mushrooms all over the place. Armed with my field guide, I proceeded to try to identify each one. Most that I found turned out to be edible, but some were not. Now, wherever I go I look for mushrooms. Now, I see mushrooms where I never noticed them before. They are all around us, you just need to know where to look!

Lilac-brown Bolete
This is a good edible mushroom.
It is related to the Cepe, but it is not as delicious.


Yellow-orange Fly Agaric
This is a poisonous mushroom that should not be eaten.
It is not deadly, but it may cause sweating, deep sleep, and disorientation.
Admire its beauty from a distance.

Sauteed Wild Chanterelle Mushrooms
  • 1/2 pound wild Chanterelle mushrooms, cleaned and torn into quarters or in half
  • 1 large shallot, finely minced
  • 4 tablespoons finest quality, unsalted butter
  • 2 tablespoons tart, crisp white wine (Chenin Blanc or Sauvignon Blanc)
  • 1 tablespoon flat-leaf parsley, finely chopped
  • salt and pepper to taste
Heat butter in a large saute pan. Add shallots and saute until they turn translucent. Add torn mushrooms and continue to saute over high heat for 5 minutes. Add wine, and season with salt and pepper. Continue to saute until all moisture evaporates. Sprinkle with chopped parsley and serve.

The mushrooms can be served as a garnish, or as their own course. If you actually find wild mushrooms, I recommend serving them on their own because they are a special treat. This recipe can of course be made with purchased Chanterelle mushrooms! Bon Appetit!

Thursday, July 23, 2009

BTKW Chef's Garden 2009 Update: French Fingerling Potatoes


Today is a special day! The French Fingerling Potatoes are in, and they are gorgeous! I can't believe how well they did. This was my first time growing this variety and I couldn't be happier with the results. Who knew that buying a bag of fingerling potatoes from Whole Foods, letting them start to sprout, and planting them could result in such a bountiful potato harvest 4 months later? From a 1 pound bag of potatoes, I ended up with about 10 pounds of beautiful, blushing fingerlings. I can't wait to cook these beauties. There is nothing better than a fresh potato straight from the Earth. I like to simply steam them, crush slightly, drizzle with the finest extra virgin olive oil, and sprinkle with crunchy sea salt. This simple preparation allows one to really taste the true essence of the potato.


Freshly unearthed French Fingerling Potatoes.


French Fingerling Potatoes basking in the sun, waiting to be gathered.


French Fingerling Potatoes of different shapes and sizes.

Saturday, July 18, 2009

Poaching Truffles

Summer Truffles (Tuber aestivum)

Black Perigord/Winter Truffle (Tuber melanosporum) season is over, and now it is time for the lesser Summer Truffle (Tuber aestivum). Don't get me wrong, I smile when I see any truffle, but sometimes the summer variety can be a little lackluster. There is nothing in the world like the Perigord Truffle, which is why it is so expensive - $70.00 per ounce, compared to the Summer Truffle at $14.00 per ounce. This difference in price and desirability is due to the fact that the flavor and scent of the Perigord Truffle is far superior to the summer variety. The Perigord Truffle is a thing of legend, the Holy Grail of the Fungus Kingdom. Like all of nature's finest treasures, it has a short season. They are only available fresh from late autumn through the winter, with January being their peak month.

When the supply of Winter/Perigord Truffles dries up, the Summer Truffle appears on the market. Their official season is from June to November. They look like their more famous cousin on the outside, but inside they are usually white and they do not have the same intoxicating fragrance. They can still be used the same way that Perigord Truffles are used, but they are not as memorable. They are almost place holders in a recipe, standing in for the resting Diva.

To help the Summer Truffle attain a place of dignity, it needs a little help. The best way to do this is to poach them in a flavorful mushroom and madeira stock. This not only helps to improve the flavor and texture, but it also helps to preserve the truffles for a considerable time. This technique can also be used to preserve Perigord Truffles during their season.

Here is a recipe for a flavorful truffle poaching stock. To help reinforce the truffle flavor, I like to add Winter/Perigord Truffle juice. This product is expensive, but it is worth the investment. You can obtain truffle juice from D'Artagnan.

Poached Truffles

For the mushroom stock:
  • 2 cups mushroom stems
  • 1 tablespoon minced shallot
  • 1 tablespoon chopped carrot
  • 1 tablespoon chopped celery
  • 2 cups water
  • 1 sprig fresh thyme
  • 6 black peppercorns
  • 2 tablespoons Madeira
Combine all ingredients in a medium saucepan, bring to a boil, and simmer for 20 minutes. After 20 minutes, strain stock being sure to press on solids to obtain as much liquid as possible. Return liquid to stove, and reduce stock to 1 cup.

To poach the truffles:
  • 1 cup mushroom stock
  • 1/4 cup Winter/Perigord Truffle juice
  • 2 tablespoons Madeira
  • 1/4 teaspoon sea salt
  • 6 fresh truffles, cleaned
Place stock, juice, Madeira, and salt in a small saucepan. Bring to a gentle simmer. Add the cleaned truffles and turn heat down to lowest setting. Gently poach the truffles for 20 minutes. Remove the truffles from the poaching liquid and place them in a sterilized, sealing jar. Pour the poaching liquid over the truffles, being sure that they are completely submerged. Allow to cool to room temperature, seal jar, and store in the refrigerator. As long as the truffles are submerged, they can be stored for up to 6 months.

Use the poached truffles in your favorite recipes, and also use the poaching liquid as it is packed with great flavor. Just remember, be sure to save enough liquid to keep your truffles completely submerged.

Monday, July 13, 2009

BTKW Chef's Garden 2009 Update


The Summer is flying by! I was out of town for 2 weeks and returned to a garden brimming with produce that was ready to be picked. Everything is doing well except for the tomato and pepper plants. We have had an unusually cool growing season in the Chicago area, and the tomatoes developed some sort of fungal disease. The leaves are just shriveling up and dying. The plants are loaded with fruit, but I don't know if they will have the strength to ripen. I may have to pick early. The pepper plants are just stunted and spindly from the cool temperatures. From what I have heard, this is happening in New England as well.

Not all is bleak however, the cold crops are thriving! The cabbages, broccoli, and cauliflower are doing incredibly well. All of my herbs are thriving, and the onions are starting to come in. The raspberries have also started coming in. They are fragrant and sweet. Everything else is coming along at a normal pace for this time of year. It is nice to see all of my hard work start to pay off!

So, here's a rundown of what I harvested today:
  • Raspberries
  • Cabbages
  • Rainbow Swiss Chard
  • Cauliflower
  • Bush Beans (Green, Purple, and Yellow)
  • Shallots
  • Yellow Onions
Stat tuned for further garden updates!

The cabbages are doing very well. These giant beauties are so sweet!


First batch of yellow onions!

Thursday, June 18, 2009

BTKW Chef's Garden 2009 Update : First Broccoli of the Season!


This is the first of hopefully many garden updates. The cool weather and abundant rainfall have been very beneficial for cruciferous vegetables. As a result, I have just harvested the first broccoli of the 2009 season! It is incredibly sweet and fresh. Broccoli this fresh does not require too much cooking, just a light saute in a little olive oil or butter and a sprinkling of sea salt.

Sunday, June 14, 2009

BBQ Sauce


There are as many recipes for BBQ sauce as there are people who love BBQ. It is amazing that a simple condiment can evoke such passion in the human soul. It is a testament to the power of cooking and its link to our evolution as a species. I happen to love all sorts of BBQ sauce. Tomato- based or vinegar- based, just keep the BBQ coming! I use many sauces at Beyond The Kitchen Wall, depending on my mood or what I have a taste for. The great thing about BBQ is that there is always something new to try. The following recipe is for my tomato-based BBQ sauce. It is fairly straight forward until you get to one ingredient, vanilla. I love vanilla, and try to use it everywhere that I can. It highlights the sweetness in this sauce recipe, and lingers gently on the palate. It adds an exotic, almost mysterious flavor that leaves you wanting to take another bite.

BTKW BBQ Sauce
Makes about 1 Quart

  • 2 tablespoons olive oil
  • 1/2 large onion, finely minced
  • 3 garlic cloves, finely minced
  • 1 15 oz. can tomato sauce
  • 1 6 oz. can tomato paste
  • 1 cup dark brown sugar
  • 1/2 cup apple cider vinegar
  • 2 tablespoons Worcestershire sauce
  • 2 tablespoons smoked hot paprika
  • 1 teaspoon dry mustard
  • 1 teaspoon Ceylon cinnamon
  • 1 teaspoon dried thyme
  • 1teaspoon freshly ground pepper
  • 1/2 teaspoon ground cumin
  • 1/2 teaspoon ground savory
  • 2 teaspoons kosher salt
  • 1 12 oz. bottle flavorful beer, or 12 oz. apple juice
  • 1 teaspoon Madagascar vanilla

Place the oil in a medium sauce pan over medium-high heat. Add the onion and garlic and cook until translucent. Add all of the other ingredients except for the vanilla, mix well, and bring to a simmer. Reduce heat to low, and allow to simmer until reduced to 4 cups, stirring often to insure that sauce does not scorch. This should take about 1 hour. When reduced, remove from heat and allow to cool slightly. Puree sauce using an immersion blender, or in a food processor. Once pureed, add vanilla and mix thoroughly. Sauce may be stored in a jar in the refrigerator for 1 month.

Blending Spices : Dry Rub for BBQ Ribs


Many people are intimidated when it comes to creating their own spice blends. Really, it couldn't be easier, and I find it to be one of the most enjoyable aspects of cooking. I feel like some sort of mad alchemist when I have all of my spice bottles lined up before me. What I add and how much determine what my final result will be. Will my blend lean more towards Indian or Moroccan? Will it be Latin or Middle Eastern? Or will it be something uniquely my own?
The possibilities are endless, as all of the world's exotic flavor signatures are locked within those little glass jars.

First of all, we have to define a spice. What are spices, and how are they different from herbs? The difference is that spices come from seeds, bark, fruit, roots, and flowers; and herbs come from leaves and stems. Some plants provide both herbs and spices. Cilantro and coriander come from the same plant, etc...

It is important to start with the freshest spices. All whole spices should be used within one year of purchase, and ground spices should be replaced every six to nine months. They should be stored in a cool, dry, dark place. Never store them near the stove. They should also be kept in tightly sealed jars. Glass is recommended as it will not absorb flavors.

When it comes to blending spices, start off simply, using spices that are familiar to you. Begin with two or three spices and build from there. Gradually, when you become familiar with different spices, you can find ways to add them to your blend. Just remember, Each addition will take your blend into a new direction. Learning the dominate spices of a particular cuisine will help you determine which spices work well together.

To demonstrate the magic of a great spice blend, and because Father's Day is approaching, I am giving you a recipe for a dry rub for BBQ Ribs. This is the spice blend that I use, and it couldn't be easier to put together. The list of ingredients is long, but most of these spices are fairly common in most spice racks. You will notice that this recipe also contains a few herbs. The brightness of their flavors work well to balance the heavy, earthiness of the spices.

Dry Rub for BBQ Ribs
Makes about 1 1/2 cups
  • 1/4 cup sweet Hungarian paprika
  • 2 tablespoons dry mustard powder
  • 2 tablespoons Sichuan peppercorns, whole
  • 2 tablespoons cumin, whole
  • 2 tablespoons coriander, whole
  • 2 tablespoons French thyme, dried
  • 2 tablespoons black peppercorns
  • 2 tablespoons savory, dried
  • 2 tablespoons caraway seed
  • 1 teaspoon allspice, ground
  • 1 teaspoon anise seed, whole
  • 1 teaspoon turmeric, ground
  • 1 teaspoon ginger, ground
  • 1 clove, whole
  • 2 bay leaves
Simply grind all of the spices together, in batches, in a spice grinder. Be sure that everything is ground as finely as possible. Place finely ground spices into a glass or metal bowl and whisk together to be sure that everything is blended thoroughly. Store in a tightly sealing glass jar.


To use, sprinkle generously on both sides of ribs which have been thoroughly cleaned (you can ask your butcher to do this) and seasoned generously with kosher salt. Allow to rest in the refrigerator for at least 2 hours.


Cook according to your favorite method. I use a hot/fast method as opposed to the low/slow method. The ribs do not require any "parboiling". They become juicy and tender on there own. They cook for about 1 hour to 1 hour and 20 minutes depending on your fire. If you use sauce, do NOT apply it until the ribs are completely cooked. Any good quality BBQ sauce works well with this rub. If you like to use a mop, may I suggest the following:

BBQ Mop
  • 1 cup water or beer
  • 1/4 cup cider vinegar
  • 2 tablespoons spice rub
  • 1/2 teaspoon kosher salt
Mix all ingredients together and mop ribs every15 minutes, and every time ribs are turned.

Thursday, June 11, 2009

Grasshoppers, Anyone?


Now this a souvenir! A fresh jar of grasshoppers from Mexico! I knew that people have eaten various types of insects in Mexico for thousands of years, but I did not know that they now had them packaged for export! This is a jar of Chapurrines brand chapulines (grasshoppers). The jar claims that they are a HOT item for export. Who am I to argue. When I saw these, I knew that they were something that I had to try. Why should Anthony Bourdain and Andrew Zimmern be the only ones who get to have all of the fun?

I have to admit that my cultural conditioning made me a little squeamish at first, but I was able to temporarily overcome my aversion to insects. I ate one. It wasn't bad. It tasted sort of tart and earthy, like sumac. I don't think that I will make them a part of my usual dining routine, but I am glad to say that I have finally tried insects. They are, after all, a very important food source for many people in the world.

In case you were wondering what to do with your Chapurrines, don't worry. There are recipe suggestions right on the jar! Here is one that I thought sounded pretty good (I changed it a bit because I just can't help myself):


Pico de Gallo con Chapurrines (Chapulines)
  • 1 large tomato, diced small
  • 1/4 large onion, diced small
  • 1/2 avocado, diced small
  • 3 jalapenos or to taste, chopped
  • 1/4 cup cilantro, chopped
  • 1 tablespoon lime juice
  • 75 grams (1 jar) Chapurrines brand chapulines
  • salt to taste
  • 2 tablespoons olive oil
Mix everything together and let rest in the refrigerator for 15 minutes before serving.
Serve with chips, vegetables, or use on tacos.

Sunday, June 7, 2009

BTKW Chef's Garden 2009

View of the estate and part of the garden. We just built several raised beds right on the lawn!
Herbs are in a separate location .

Not only do I love to cook, I also love to garden! This year at Beyond The Kitchen Wall I was able to plant a large vegetable and herb garden. There is nothing better than growing your own fresh fruits and vegetables. Everyone who loves to cook should strive to grow some sort of garden, even if it is just a pot of herbs on a small balcony. I love working with fresh, local produce. I am constantly wandering around the local Farmers' Markets looking for the freshest treasures of the season. This year I will have produce from the farm and from the garden! I am very excited, and I can't wait to serve my fresh veggies to the family that I work for. They are in for some real treats.

The garden is organic, of course. It consists of several raised beds that were built right on the lawn in the backyard. A majority of the plants were placed in these beds, but there are other smaller spots that were commandeered for vegetables and herbs. The herbs were planted as close to the kitchen as possible. Basically, I have turned a great estate on Chicago's North Shore into a farm. Does that make me a Gentleman Farmer??? It is going to be a great season!

I wanted to share some pictures of my garden with you, and give a list of everything that I planted this year. I have been very busy, and my hard work seems to be paying off. The weather has been unseasonably cool so far this year, so some of the crops got off to a slow start. The cruciferous vegetables however, are thriving!

Chives in bloom


French Fingerling Potatoes


My first Tomato of the season!


Broccoli, Cauliflower, and Cabbages


First head of Broccoli!


Raspberries


Tomato bed


Rainbow Swiss Chard


Bush Beans


Shallots


Red and Yellow Onions


Garlic

This year I planted (not in any particular order) :
  • French Thyme
  • Italian Parsley
  • Basil, various
  • Sage
  • Cilantro
  • French Lavender
  • Lemon Grass
  • Lemon Balm
  • Lovage
  • Dill
  • Oregano
  • Summer Savory
  • Chervil
  • Chives
  • Garlic Chives
  • Rosemary
  • Strawberries
  • Raspberries
  • Blueberries
  • Broccoli
  • Cauliflower
  • Brasica Cauliflower
  • Cabbages
  • Corn
  • Artichokes
  • Tomatoes, various
  • Peppers, various
  • Chiles, various
  • Onions, red and yellow
  • Pickling Cucumbers
  • Charentais Melons
  • French Fingerling Potatoes
  • Rainbow Swiss Chard
  • Parsnips
  • Bush Beans, green, yellow, and purple
  • Beets, red and gold
  • Fennel
  • Carrots, multi-colored
  • Butternut Squash
  • Delicata Squash
  • Patty Pan Squash
  • Pumpkins