Sunday, December 28, 2008

Braised Short Ribs

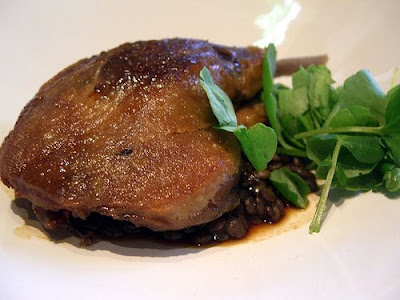
Serving Suggestion: Braised Short Ribs with Sweet Potato Puree, and Sauteed Vegetables

This is one of my favorite dishes to prepare in the wintertime. There is something so comforting about a pot of braised short ribs. Proper braising transforms tough, fatty meat into tender, succulent elegance. Make this recipe on a cold, snowy night and your family will think you are a kitchen hero!

Braised Short Ribs
Serves 6

  • 6 beef short ribs, tied with kitchen twine
  • 2 medium Spanish onions, roughly chopped
  • 2 large carrots, cut into 1 inch pieces
  • 2 celery stalks, cut into 1 inch pieces
  • 2 garlic cloves, smashed
  • 12 sprigs of fresh thyme
  • 1 bay leaf
  • 2 whole cloves
  • 3 tablespoons butter or olive oil
  • 3 tablespoons tomato paste
  • 3 tablespoons all-purpose flour
  • 1 cup port
  • 1 bottle cabernet sauvignon or Bordeaux
  • kosher salt and pepper to taste
  • 4 to 6 cups veal or beef stock

Preheat oven to 300 degrees F.

Season to ribs with salt and pepper. Heat the butter or oil in a large Dutch oven over medium-high flame until hot. Working in batches, brown the short ribs well on all sides. This will take some time, probably 5 to 10 minutes per side. The time invested in the browning will pay off in the end. The better the browning, the better the final product. Once brown, remove the ribs and set aside.

Pour off the fat, lower the heat to medium, and add the vegetables and garlic. Saute for 5 minutes. Add the tomato paste and cook for for 3 minutes more. Add the flour, and stir to combine. Add the wines, herbs, and cloves. Increase heat to high, and reduce the liquid by half, stirring from time to time. This will take about 15 to 20 minutes.

Add the ribs to the pot and enough stock to cover the ribs by 1 inch. Season with salt and pepper to taste. Bring pot to a gentle simmer, cover, and place in preheated oven. Gently cook the ribs for about 3 hours. After 3 hours, test for doneness by piercing the meat with a small knife. It should be very soft, "like butta", and practically falling off the bone. If the ribs are not quite tender, cook for an additional 30 minutes.

Once done, transfer the ribs to a large platter and remove the strings. Skim fat from the surface of the sauce, and strain into a medium saucepan. Discard the vegetables, they have given everything that they had to the sauce. Reduce the sauce over medium-low heat by about half. This should take 30 to 45 minutes.

Return ribs to the pot, simmer for about 10 minutes, and serve.


Sunday, December 21, 2008

Poached Fig, Rapberry, and Quince Galette


Sorry that I have been away for a while. The month of December begins my busiest season of the year. The family that I work for does Christmas in a big way, and there are many things to prepare for weeks in advance. Also, I do some parties on the side for a little extra holiday cash!

I must also admit that I have had a touch of writer's block. There are many things that I want to write about, and I think that they all got backed up in my head. So I think that I am finally over the hump, and shall begin to share more recipes with you.

This recipe is for another original, my Poached Fig, Raspberry, and Quince Galette. It was inspired by my fascination with the cooking of Southwestern France. This galette is both rustic in appearance, and sophisticated in flavor. The poached figs, raspberries, and quince preserves marry beautifully, all being nestled in an almond frangipane. This galette is great by itself, or topped with a dollop of armagnac scented whipped cream.


Poached Fig, Raspberry, and Quince Galette
Serves 8 to 10

Move oven rack to the center position. Preheat oven to 400 degrees. Roll pie dough between 2 sheets of parchment paper to an 11 inch circle. Remove top layer of paper and gently press an 8 inch cake pan into the center of the dough. This will help you to center the filling. Spread frangipane on dough within the demarcated circle. Spread quince jam over the frangipane, gently swirling the two together. Arrange fig quarters over the jam, cut sides up. Finally, evenly arrange the IQF raspberries amongst the figs.

Gently fold marginal dough towards the center of the galette, overlapping the dough as you go around the galette (see picture). Brush the outside of the dough with the beaten egg, being careful not to get egg in the filling, or filling onto the brush. Finally, sprinkle sanding sugar over the whole galette, being sure that crust is generously covered.

Slide the galette with the parchment paper onto a flat baking sheet and bake for 40 minutes, or until golden brown and bubbly in the center. Remove from the oven and slide the galette, using the parchment paper, onto a cooling rack. Cool for at least 1 hour before serving.

Back To Basics: Frangipane Cream

Frangipane is that wonderful almond flavored cream that is the base for many fruit tarts. It is also used as a filling in breads, croissants, and the classic Gateau Pithivier. It has a rich bitter almond scent that brings Old World charm to any pastry.

The face of frangipane has changed a bit since Escoffier codified the ancient recipe in his magnum opus, The Complete Guide to the Art of Modern Cookery. In Escoffier's time, the rich pastry filling was made using crushed (almond) macaroon crumbs. Today, ground almonds or almond flour are more generally used in the recipe, since most of us don't have access to macaroon crumbs. The modern recipe is very good, but it lacks the sophistication of the original. Also, the original recipe clearly demonstrates the number one rule of the French Kitchen, WASTE NOTHING! If you have broken, not so nice, (or fresh) macaroons that you can't sell anymore, grind them up and turn them into something else!

Below I give two recipes for frangipane cream, a modern recipe and the classic recipe as it appears in Escoffier. Try them both if you feel like comparing them for yourself. If you do not feel like baking your own macaroons just to grind them up, you can probably find a bakery that will sell you old, broken cookies cheaply. Older cookies are easier to grind, anyway.

Creme Frangipane (Modern)

  • 4 ounces almond flour*
  • 4 ounces granulated sugar
  • 1 1/2 tablespoons all-purpose flour
  • 4 ounces unsalted butter
  • 2 large eggs
  • 1 tablespoon almond extract

Using a mixer, cream butter and sugar together. Add eggs one at a time, and mix until smooth and fluffy. Add almond flour, flour, and almond extract, and mix until well blended. Refrigerate at least 1 hour before using.

* If you can't find almond flour, grind 4 ounces of blanched almonds with the flour in a food processor until fine, but not pasty.

Creme Frangipane (Escoffier)

  • 9 ounces granulated sugar
  • 9 ounces all-purpose flour
  • 4 large eggs
  • 8 large egg yolks
  • 6 1/2 cups whole milk
  • 1 vanilla pod
  • small pinch of salt
  • 2 ounces crushed macaroons
  • 3 1/2 ounces unsalted butter

Bring milk to a boil and infuse with the vanilla pod. Place sugar, flour, eggs, yolks, and salt in a pan and mix together with a wooden spoon. Pour in the milk slowly, mixing well. Place on the stove and bring to a boil stirring all the time; allow to boil for 2 minutes then pour into a bowl. Add and mix in the butter and macaroons. Cover the surface with butter or plastic to prevent a skin from forming.

As you can see, this is a large recipe, so cut it in half if you want to. I just wanted to present it as it was written by the master. Happy Baking!

Friday, December 5, 2008

Back to Basics: Flaky Pie Dough

This is the basic pie dough recipe that I use for my pies and galettes. It is a very versatile dough that works well with both sweet and savory preparations. This recipe makes enough dough for 4 single-crust pies or galettes, or 2 double-crust pies. I usually try to have this dough in my freezer so that pie making is quick and easy.

Flaky Pie Dough
  • 51/2 cups pastry flour
  • 1 tablespoon sea salt
  • 8 ounces unsalted butter, cut into small pieces
  • 9 ounces non-hydrogenated vegetable shortening, cut into small pieces
  • 1 cup ice-cold water

Place the flour and sea salt in the bowl of a standing mixer. Turn on lowest setting, just to blend. Add butter and mix until well incorporated, the mixture should look like large grains of couscous. Add the shortening, and mix just well enough to blend, but you should still see large pieces of shortening. This will give you a flaky crust. Finally, add the water all at once and mix just until the dough comes together. Divide the dough into 4 equal portions and wrap in plastic, flatten into a disk, and chill for at least 1 hour before using. Unused dough can be stored in the refrigerator for 2 days, or frozen for 1 month.

Sunday, November 30, 2008

Inside The Long of Naples Squash


Back in October I introduced you to an heirloom variety of squash called The Long of Naples.

This was the first squash of this type that I had ever seen. It was huge, about 25 pounds! Despite many attempts to find any information about this squash, I came up empty handed. The only info I found was where to buy seeds, or who was attempting to grow them. There was no information about what this beautiful squash tasted like, or how to cook it. So when faced with the unknown, the best thing a Chef can do is dive in and experiment for himself.

The Long of Naples is a very unique squash. It's morphology is like that of the Butternut Squash. The seeds are all at one, slightly bulbous end. The rest of the squash is solid flesh. That is where the similarities end. The color is very rich, like that of the Red Kuri Squash. It's flavor is interesting, somewhat reminiscent of squash and melon, but very delicate. It also has a squashy, melon-like perfume. Despite its size, it is not a particularly hard squash. I found it easier to work with than most hard squashes. Its flesh is also texturally different than most other hard squashes, again it reminded me of melon. It was even pleasant to eat completely raw as it is not a very starchy squash.

As far as cooking, I have been treating the Long of Naples like any other squash, though it is not very starchy, and exudes a lot of liquid. I pureed a piece of it into a soup (recipe follows), I mixed it with other squashes and potatoes in an Autumn Vegetable Hash (recipe to follow soon), and I simply sauteed some in brown butter with sage for a simple side dish. The flavor is delicate, but delicious.

Long of Naples Squash Bisque with Sage Cream, Fried Prosciutto, and White Truffles
Serves 6

  • 4 cups Long of Naples Squash, diced small
  • 2 medium Spanish onions, chopped
  • 1 large Granny Smith apple, peeled, cored, and diced small
  • 2 tablespoons unsalted butter
  • 2 to 3 cups chicken stock
  • 1/4 cup Vin Santo
  • 1/8 teaspoon nutmeg, freshly grated
  • 1 cup whipping cream
  • 5 sage leaves, fresh
  • 1/4 pound Prosciutto di Parma, thinly sliced
  • 1 small white truffle

Place 1/2 cup of the cream and sage leaves in a small saucepan. Bring to a boil, remove from heat, pour into a clean mixing bowl (metal is best), season with salt and pepper to taste, cover with plastic wrap, and refrigerate.

Saute onions and apple in butter over medium heat in a large sauce pan until soft and translucent. Add squash and 2 cups of chicken stock, the nutmeg, and salt and pepper to taste. Bring to a boil, cover, reduce heat, and gently simmer for 1 hour. Stir from time to time. After 1 hour, check to see if squash is soft enough to make a smooth puree. To do this, gently squeeze a piece between your fingers to be sure there are no hard little grainy bits. If not cooked enough, gently simmer, covered, for 30 minutes more.

Using an immersion blender, puree the soup, adding more hot chicken stock as needed to achieve a smooth puree the consistency of heavy cream. Return pot to gentle heat and add the Vin Santo and remaining 1/2 cup of cream. Adjust the seasoning, and gently simmer for 15 minutes.

While soup is simmering, chop prosciutto into large pieces. Gently fry in a small pan until it begins to get crispy. Add a little butter to the pan if needed. Once crispy, drain on paper towels and reserve.

Remove sage infused cream from refrigerator, strain out sage leaves, and whip to soft peaks. Reserve.

To serve soup:

Ladle hot soup into a bowl, top with a dollop of sage cream, sprinkle on fried prosciutto, and finish with a few shavings of white truffle. Serve immediately.

Reverse Chocolate Chip Cookies


Here is a fun variation based on the Chocolate Chip Cookie recipe that I published back in August. Rich, dark cocoa powder is added to the dough and white chocolate chips replace the usual bittersweet chips. The resulting cookie is incredibly decadent. The rich, chocolaty dough is enhanced by the vanilla richness of the white chocolate. These are great cookies to make for kids because the white chocolate is sweeter than expected and helps to tame the intensity of the dark cocoa, which some kids just don't like. It is also fun to make a batch of these cookies when you make a batch of regular chocolate chip cookies. They are like photo negatives of each other. This recipe makes 16 to 18 large cookies.

Reverse Chocolate Chip Cookies

  • 1 1/2 sticks of softened unsalted butter
  • 1 cup dark brown sugar
  • 1/2 cup granulated sugar
  • 2 whole eggs
  • 2 teaspoons Madagascar vanilla extract
  • 1 3/4 cups unbleached all-purpose flour
  • 1/2 cup dutch processed cocoa powder, I prefer Valrhona
  • 1/2 teaspoon baking powder
  • 1 teaspoon sea salt
  • 2 cups best quality white chocolate chips or chunks

Position oven racks to center of oven. Preheat oven to 325 degrees. Line 3 baking sheets with parchment or use a Silpat.

Mix flour, cocoa, baking powder, and salt together using a whisk.

Using a mixer, cream butter and sugars together until light and fluffy. Scrape down the sides of the bowl to be sure that they are well blended. Add the eggs, one at a time, and mix until well blended. Scrape down the sides, add vanilla and mix until well blended.

Scrape the sides again and add the flour/cocoa mixture. Mix on low speed until just about incorporated. Finally, add the white chocolate chips and mix until just incorporated and no more dry flour or cocoa is visible. Allow dough to rest in the refrigerator for at least 1 hour, but overnight is better to develop deeper flavor.

After dough has rested, scoop out scant 1/4 cup portions of dough, form into mounds, and place on prepared pans. Place 6 mounds per sheet. Using the heel of your hand, lightly flatten each mound of dough. If dough sticks to your hand, wet hand slightly.

Bake for 18 to 20 minutes. For best results, bake only 1 pan at a time. When finished, remove cookies from pan using a spatula, and place on a cooling rack. Repeat with remaining pans.

Thursday, November 20, 2008

Chestnut and Armagnac Brownies

I developed this brownie recipe one day while my boss was away and I had some time on my hands to play around in the kitchen. The Fall is my favorite time to cook because all of my favorite ingredients are in season. Chestnuts are one of those often overlooked ingredients. Here in the United States we do not use chestnuts enough. We may see them at Thanksgiving in a chestnut stuffing, or roast them over an open fire at Christmas, but that's about it. The rest of the time they are ignored. It's sad because they are delicious and fun to work with. These days, with all of the jarred and canned products available, there is no excuse to not use them in our recipes. All of the hard work is done and we can just enjoy the sweet rewards. My favorite brand of chestnut products comes from the Clement Faugier Company of France. They have been making chestnut products since 1882, and they do it with class and style. Their products can be found at Whole Foods Market, or on-line. Check out their website link in the Useful Links List to the right.

These are sophisticated brownies. The combination of chestnuts, armagnac, and bittersweet chocolate evoke the flavors of the French Southwest. You could almost say that these are brownies for adults. Their texture is delicate and almost silky, with an intense chocolate-armagnac flavor. They are great by themselves, or use them as a base for an upscale ice cream sundae.


Chestnut and Armagnac Brownies
Makes 18 large or 24 small Brownies
  • 12 ounces Valrhona Le Noir Gastronomie 61%, chopped
  • 4 ounces unsalted butter
  • 3/4 cup unsweetened chestnut puree
  • 1/2 cup + 2 tablespoons granulated sugar
  • 4 large eggs, lightly beaten
  • 1 tablespoon Tahitian vanilla
  • 1/4 cup Armagnac
  • 1/2 cup all-purpose flour
  • 1 teaspoon fleur de sel

Procedure:

Preheat oven to 350 degrees, lightly butter a 9 x 13 glass baking pan.

Melt butter and 8 ounces of chocolate together in a small saucepan over extremely low heat. Allow to cool slightly. While chocolate is melting, place chestnut puree and sugar together in the bowl of a standing mixer. Using the paddle attachment, combine on medium speed until completely blended and no little lumps of chestnut puree are visible. Remove bowl from mixer.

Add lightly beaten eggs to the chestnut mixture about a quarter at a time and mix gently with a wooden spoon until completely incorporated. Be careful not to mix in too much air. Add melted butter and chocolate and combine thoroughly with the wooden spoon. Add the vanilla, armagnac, and salt and mix thoroughly. Finally, add the flour and mix until no dry flour is visible. Don't overwork the mixture, we don't want any gluten activation.

Spread the batter into prepared pan and smooth evenly. Melt the remaining 4 ounces of chocolate in a small glass bowl in the microwave. To do this, cook for 30 seconds on half power, stir and repeat. You will probably have to do this 3 to 4 times. If chocolate starts to get too hot, just stir it until all lumps are melted. Chocolate melts at very low temperatures.

Pour melted chocolate evenly over brownie batter. Using a wooden skewer, or a thin knife, swirl the melted chocolate into the batter. Bake in preheated oven on center rack for 25 to 30 minutes. When done, center will be springy, and a wooden skewer will come out fairly clean.

Allow brownies to cool completely in the pan before cutting. Cut into 18 large brownies, or 24 smaller brownies. Enjoy!

Chestnut and Armagnac BrowniesRich and decadent, these brownies will transport you to the ...See Chestnut and Armagnac Brownies on Key Ingredient.

Tuesday, November 11, 2008

BTKW Tip: Save Your Parmigiano Cheese Rinds


I always grate my own Parmigiano Cheese. Nothing can compare with the flavor. The pregrated products, you know, "The Green Can", are garbage. Also, domestic "Parmesan" cheeses are a far cry from the sumptuous complexity of the real thing. Did you know that you can use the entire chunk of Parmigiano Reggiano that you buy? After you have grated the inner portion over all of your favorite pastas, you can also use the rind! Save it, don't throw it away. Store it in a plastic bag in your freezer until you are ready to use it. It packs a powerful flavor punch. Add it to soups or stews. A hearty Minestrone is made even better by the addition of one or two cheese rinds. Just add them, and let them become part of the soup. I must confess that I have been known to fish them out and just eat them! Probably kind of gross from a caloric point of view, but just delicious. The rind has an incredible texture after cooking for a couple of hours. Try it! You can also use the rinds of your other favorite Italian Hard Cheeses, such as Grana Padano. It's a great way to really get your money's worth.

Sunday, November 9, 2008

Back To Basics: Chicken Stock


Nothing is more basic to the great cuisines of the world than a good, flavorful chicken stock. It is the foundation upon which other great dishes are built. There is something magical about a pot of simmering stock. For me, the act of stock-making is almost a religious experience. The sights, sounds, and smells transport me back to when I was a child and would watch my mom make her delicious chicken soup. It was humble, but it was full of love and soul. It was comfort in a bowl. The key was the stock, carefully made and lovingly tended to.
Today, there are a multitude of ready-made "stocks" on the market. Some are fairly good, but most are little more than dirty water. In a pinch, they have their uses, but could never compare with a homemade stock. Bouillon cubes are nothing more than salt and really should never be used, for anything!
The following chicken stock recipe is the one that I use for most of my Western recipes. It is a classic French Chicken Stock, or Fond de Volaille. Once obtained, the basic stock can be used for soups, sauces, or wherever extra flavor and richness is needed.

Chicken Stock or Fond de Volaille
Makes 3 Quarts

  • 5 pounds chicken backs, necks, wings, or carcasses
  • 2 large yellow onions, roughly chopped
  • 3 celery ribs, roughly sliced
  • 3 carrots, roughly sliced
  • small bunch fresh thyme sprigs (7 to 10)
  • small bunch parsley stems (12 to 15)
  • 1 bay leaf, fresh if possible
  • 12 black peppercorns
  • 2 whole cloves or 4 whole allspice berries (my mom used allspice)
  • water to cover

Place the chicken pieces in a large stock pot. Fill pot with enough cold water to cover the chicken. Place on high heat and bring to a boil. Reduce heat to medium, and cook for 10 minutes. Pour chicken and water through a colander. Rinse chicken under running water to remove any clinging scum. Rinse out the pot!

Place chicken back into the pot along with all of the other ingredients. Fill with about 6 quarts of water. Bring back to a boil over high heat. Once pot begins to boil, reduce heat to low and allow to gently simmer for 4 hours. There should barely be any movement in the stock. Adjust heat to maintain the gentlest simmer. This will ensure that the stock will be crystal clear.

Skim off any scum that rises to the surface of the stock. If the stock seems to be evaporating too quickly, add enough water to just barely cover the ingredients.

After 4 hours, remove the stock pot from the heat and strain out the solids. Strain the stock through a fine sieve to remove any little particles. Cool the stock and then refrigerate overnight. The next day, you can remove the fat that has risen and solidified on top of the stock. Do not throw this fat away, you can use it to fry potatoes! Return stock to the stove and reduce it to concentrate the flavors. I recommend reducing it until you are left with about 3 quarts of stock. This will give you optimal flavor and cut your reduction time in any sauces that you make with the stock. Cool the stock and refrigerate.

Stock may now be stored in the refrigerator for 3 days, or frozen for up to 3 months.

Sunday, November 2, 2008

Poached Figs in Raspberry and Red Wine Sauce


Fresh figs are one of my favorite fruits to cook with. They are sweet and sensuous, just cut one open and look at it! They are very versatile, lending themselves well to both sweet and savory dishes. In the Fall when figs are in season, I try to use them in as many ways as I can. Their season is short, so when I find them in the markets, I like to buy a lot of them. Since they are fairly delicate, I am always looking for ways to keep them without cooking them to death. My favorite way to do this is to lightly poach them in red wine. This allows you to preserve the figs without compromising their shape or flavor.

The following recipe is my variation on a recipe in Paula Wolfert's book "The Cooking of Southwest France". This is a great book and I highly recommend it to all of my readers. The recipe lifts figs to new heights by pairing them with Bordeaux and raspberries. My variation then gently perfumes them with Tahitian vanilla and the essence of orange blossoms. The final product is ethereal and can be used for desserts and savory preparations.

Poached Figs in Raspberry and Red Wine Sauce

  • 1 pint fresh raspberries, or 2 cups IQF raspberries, thawed
  • Juice of 1/2 lemon
  • 1 cup granulated sugar
  • 1 bottle (750 ml.) red Bordeaux wine
  • 12 fresh black Mission figs
  • Zest of 1 orange
  • 1/4 teaspoon sea salt
  • 1/2 fresh Tahitian vanilla pod, sliced open length-wise
  • 2 teaspoons orange blossom water
  • Place the raspberries in the bowl of a food processor and puree for 1 minute. Strain through a sieve to remove the seeds.
  • Place puree in a large saucepan along with the lemon juice, sugar, wine, orange zest, and salt.
  • Bring to a boil, then reduce heat to medium-low and simmer uncovered for 30 minutes, or until sauce becomes syrupy.
  • Add the figs and gently poach for 5 minutes, turning them often in the hot syrup.
  • Turn heat off and allow figs and syrup to cool to room temperature.
  • Place figs and syrup into a sealable jar and add vanilla pod and orange blossom water. Seal jar and refrigerate for 3 days. After 3 days the figs are ready for use.

Sunday, October 26, 2008

Heirloom Vegetable: Long of Naples Squash


WOW! Look at the size of this incredible squash. It weighs about 25 pounds.
It is an Italian heirloom variety known as the Long of Naples.
It was grown by Green Acres Farm of North Judson, Indiana.
The squash was purchased by the family that I work for at the Chicago City Green Market.
Now it is in my care and shall become the focus of my menus for the week (or month, this thing is HUGE!). I have been trying to learn more about this type of squash on the Net, but there isn't much info. If anyone has any info or lore about this varietal please share it with me. I am in awe of this beauty. I will share my squash recipes with all of you in the coming weeks!

Friday, October 24, 2008

BTKW Culinary Heritage Recipes


You may have noticed the new "BTKW Culinary Heritage Recipes" label attached to some posts. This is a new category of recipes that Beyond the Kitchen Wall will be compiling as an ongoing effort to preserve Culinary Traditions from around the World. The recipes with this label are the very essence of a Culture or a Cuisine. They are the basics, the treasures of our Culinary Heritage that should be preserved for all times. The loss of any one of these recipes would be a loss for all of Humanity. Please feel free to submit any recipes that you feel should be added to this archive, and explain why you feel that they define a people. Your help will be greatly appreciated! It's a big world out there, and we don't want to lose anything. Submit recipes to my E-mail which you can access through my profile. If you are a Facebook user, you can also find me there.

Wishing you all my best, and good eating,

Chef Dennis Wasko

Sunday, October 19, 2008

Mango and Habanero Chutney

This year we planted Habanero Chiles in the kitchen garden. The plants did very well and gave us an abundance of fiery fruit. There is something magical about the flavor of Habaneros, not only do they pack a massive punch, but they also have an alluring fruity perfume that other chiles just don't have. That fruitiness really comes through when they are paired with other fruits.

This week I found myself with a large batch of chiles. I needed to use them before their freshness began to fade, so I developed the following recipe using frozen mango chunks that I had in the freezer. The resulting chutney was packed with flavor and attitude. Beware though, this recipe is not for the faint of heart or gentle of stomach. It's hot, damn hot, Vindaloo hot, but delicious. Try it with chicken or pork. It works well with Indian or Caribbean dishes.

Mango and Habanero Chutney
Makes 2 Quarts

1 tablespoon virgin coconut oil
1 medium onion, chopped
8 cups fresh or frozen mango chunks
8 habanero chiles, chopped, seeds and all!
1 clove garlic, minced
2 slices fresh ginger
2 tablespoons lemon grass, chopped
1/2 cup red bell, finely diced
2 cups sugar
1 to 1 1/2 cups rice wine vinegar
1 cinnamon stick
1 star anise
salt to taste

Melt coconut oil in a medium saucepan over medium heat. Add onion and garlic and gently saute until onion becomes transluscent, do not brown. Add remaining ingredients and bring to a boil. Lower heat and gently simmer for 1 to 1 1/2 hours until chutney is thick. Gently stir from time to time, but be careful not to break up the mango too much. Check for seasoning. If chutney is not tart enough for your taste, add more vinegar. If it's too tart, add more sugar. The amounts really depend on the sweetness of the mango. Pack into clean quart jars and store in the refrigerator. It should keep for 2 months and "improve" with age.

Tuesday, October 14, 2008

BTKW Tip: IQF Berries

We had a very bountiful berry harvest in the Mid-West this year. The rainfall and fairly mild temperatures made for perfect growing conditions for all of our seasonal favorites. So what do you do with the multitude of fragile berries that you did not bake into pies, turn into jams, or just eat straight from the flat? It seems a shame to let the end of the season "leftovers" just sit and get moldy while you pay attention the new multitude of Fall fruits.

One way of preserving your berries for later use is to freeze them. The term IQF stands for Individually Quick Frozen. It's a great way to preserve berries for future recipes. It is also incredibly simple.

Line a half sheet pan with parchment paper, spread cleaned berries on sheet (be sure that they are not touching), cover with plastic, place in freezer overnight. The next day, you have IQF berries! They may now be put into storage bags for future use. Now you can enjoy farm fresh, local berries all year long.

Monday, October 13, 2008

Foodbuzz Publisher Community Launches

LAUNCH OF GLOBAL FOODBUZZ BLOGGER COMMUNITY
LEVERAGES REAL-PEOPLE, REAL-TIME POWER OF FOOD PUBLISHING

San Francisco – October 13, 2008: Foodbuzz, Inc., officially inaugurates its food blogger community with more than 1,000 blog partners, a global food blogging event and an online platform that captures the real-people, real-time power of food publishing in every corner of the world. At launch, the Foodbuzz community ranks as one of the top-10 Internet destinations for food and dining (Quantcast), with bloggers based in 45 countries and 863 cities serving up daily food content.
“Food bloggers are at the forefront of reality publishing and the dramatic growth of new media has redefined how food enthusiasts access tasty content,” said Doug Collister, Executive Vice President of Foodbuzz, Inc. “Food bloggers are the new breed of local food experts and at any minute of the day, Foodbuzz is there to help capture the immediacy of their hands-on experiences, be it a memorable restaurant meal, a trip to the farmers market, or a special home-cooked meal.”
Foodbuzz is the only online community with content created exclusively by food bloggers and rated by foodies. The site offers more than 20,000 pieces of new food and dining content weekly, including recipes, photos, blog posts, videos and restaurant reviews. Members decide the “tastiness” of each piece of content by voting and “buzz” the most popular posts to the top of the daily menu of submissions. Foodbuzz currently logs over 13 million monthly page views and over three million monthly unique visitors.
“Our goal is to be the number-one online source of quality food and dining content by promoting the talent, enthusiasm and knowledge of food bloggers around the globe,” said Ben Dehan, founder and CEO of Foodbuzz, Inc.

The Foodbuzz blogger community is growing at a rate of 40 percent per month driven by strong growth in existing partner blogs and the addition of over 100 new blogs per month. “The Foodbuzz.com Web site is like the stock of a great soup. The Web site provides the base or backbone for bloggers to interact as a community, contribute content, and have that content buzzed by their peers,” said Mr. Dehan.
Global Blogging Event
Demonstrating the talent and scope of the Foodbuzz community, 24 Meals, 24 Hours, 24 Blogs offered online food enthusiasts an international, virtual street festival of food and diversity. The new feature showcased blog posts from 24 Foodbuzz partner bloggers chronicling events occurring around the globe during a 24 hour period and included:
· Mid-Autumn Festival Banquest (New York, NY)
· The "Found on Foodbuzz" 24-Item Tasting Menu (San Francisco, CA)
· Aussie BBQ Bonanza – Celebrating Diversity (Sydney, Australia)
· The Four Corners of Carolina BBQ Road Trip (Charleston, SC)
· Criminal Tastes – An Illegal Supper (Crested Butte, CO)
· From Matambre to Empanadas: An Argentine Dinner (Buenos Aires, Argentina)
· A Sweet Trompe l’oeil (Seattle, WA)

“24 Meals, 24 Hours, 24 Blogs” captures the quality and unique local perspective of our food bloggers and shared it with the world,” said Ryan Stern, Director of the Foodbuzz Publisher Community. “It illustrates exactly what the future of food publishing is all about – real food, experienced by real people, shared real-time.”
About Foodbuzz, Inc.
Based in San Francisco, Foodbuzz, Inc., launched its beta Web site, foodbuzz.com, in 2007. In less than a year, Fooduzz.com and its community of over 1,000 exclusive partner food blogs have grown into an extended online property that reaches more than three million users.

Sunday, October 12, 2008

A Taste of Senegal

Part of the fun of being a Private Chef is that I am able to change my menus everyday. When you cook for the same four food critics day in and day out, it is important to keep things interesting. There are of course family favorites that I must keep in perpetual rotation, but I am also encouraged to be creative and come up with "something different". In true Beyond The Kitchen Wall style, I have been on a quest to introduce my clients to food traditions from the more obscure corners of the planet. I'm not saying that Western Africa is in any way obscure, but sadly its grand cuisine is not well known outside of certain circles. I had a lot of fun putting a Senegalese inspired menu together.

Filling a great mansion on Chicago's North Shore with the exotic scents of Western Africa made me smile. Here was food from a people and a culture that did not know such great wealth, but here was food that was fit for royalty. For a while, it was as if the whole kitchen had been moved to the center of Dakar, Senegal's Capital City. When dinner was served, the enthusiasm was palpable. For one evening, a small group of Americans discussed Senegal.
Here is the main course that I served that evening. Try it for yourself, and spend the evening discussing Africa and Her People.

Senegalese Chicken Yassa with
Cinnamon Scented Brown Basmati Rice
Serves 4 to 6

For the chicken:
1/4 cup freshly squeezed lemon juice
3 large onions, thinly sliced
1/4 teaspoon habanero chile, minced, or more to taste
2 tablespoons Dijon mustard
2 teaspoons ground ginger
1/4 cup + 1 tablespoon peanut oil
1/2 cup water
Salt and pepper to taste
1 stewing chicken, cut into 10 pieces (legs, thighs, wings, breasts cut in half)
1/2 cup pimento-stuffed olives
2 large carrots, thinly sliced
1 large red pepper, thinly sliced

In a small bowl, combine the lemon juice, habanero chile, Dijon mustard, ginger, 1/4 cup peanut oil, water, and salt and pepper. Place the chicken pieces and onions in a large sealable plastic bag, pour marinade over. Seal bag, toss together, and marinate in the refrigerator for 3 hours.

After 3 hours, remove chicken pieces from marinade. Strain onions from marinade and reserve both separately. Place heavy pot over medium heat. When hot, add 1 tablespoon peanut oil, and add chicken pieces. Do not crowd the pan. Brown the chicken on all sides, and set aside.
Add drained onions, and cook until they begin to caramelize, about 10 minutes. Stir onions often. Once onions begin to caramelize, add remaining ingredients plus the reserved marinade.
Bring to a boil and cook for about 15 minutes.

Add chicken pieces back to the pot along with any juices that may have accumulated. Cover, reduce heat to low, and gently simmer for 1 to 1 1/2 hours, depending on how tough your chicken is. After 1 hour, check seasoning, and adjust if needed.
Remove from heat and let rest while you prepare the rice.

For the rice:
2 cups brown Basmati rice
3 cups chicken stock
2 tablespoons peanut oil
1/2 teaspoon ground cinnamon or 1 cinnamon stick
1/2 teaspoon dried thyme
1 teaspoon salt
Pepper to taste

Place a medium pot over high heat. Add oil and 1 cup of the rice. Stir constantly until rice begins to toast. Continue stirring, once rice begins to pop like popcorn, add remaining rice and all of the remaining ingredients. Bring to a boil, stir once more, cover, reduce heat to low, and cook for 40 minutes. Turn off heat and let rest for 5 minutes. Fluff rice with a fork.

To serve:
Place a bed of rice on a large platter. Spoon some of the sauce and vegetables from the chicken over the rice. Arrange the chicken pieces over the sauce, and top with more sauce and vegetables. May be garnished with chopped parsley and lemon zest if you wish, but this is not traditional.

To learn more about the nation of Senegal, click HERE.

Thursday, October 2, 2008

The Art of Confit

The Fall is my favorite time of year to cook. It is the season when I pull out all of my favorite Classic French recipes and techniques. The smell of hearty soups and stews just makes my heart sing. This is also the time of year that I start to think about making Confit. There is something magical about this ancient process. Simple poultry or pork is turned into one of the world's culinary treasures. The process is simple, but does require some time if the final product is to achieve its full potential.

Confit is traditionally made using goose. This tough, fatty beast makes an absolutely glorious confit. Duck is also traditional, as well as pork. Today in the Southwest of France, confit is made with chicken, turkey, and just about anything that can be preserved.

So what exactly is confit? The Larousse Gastronomique defines it as "a piece of pork, goose, duck, or turkey cooked in its own fat and stored in a pot, covered in the same fat to preserve it."
It is one of the oldest forms of food preservation that was developed in Southwest France to keep meat for the long, lean months after the fall harvest/slaughter.

Today, with modern refrigeration, one would think that making confit would be obsolete. That would be true except for one very important fact; confit is incredible. It is hard to describe this transformation. Let's just say that fatty, tough meat is transformed into a rich, concentrated, succulent taste sensation. The confit process gently removes water from the meat, thereby concentrating its flavors. The process also tenderizes the meat to an almost melting consistency. There is nothing else like it!

Traditionally, only the leg, thigh, and wings of poultry are used for confit as these are the tougher cuts. The breast does not take as well to confit as it tends to dry out. With pork, the tougher cuts are also used, shoulder, ribs, etc...

The method for making confit is quite simple. If you have not made your own confit, you should try it at least once to experience the magic of this process. Of course today you can buy confit in cryovac packages, but it is not the same.

Here is a simple method for making your own confit of duck. Don't be scared, just try it.

3 5 pound ducks
1/4 cup kosher or pickling salt
1 bunch fresh thyme
3 bay leaves
1 tablespoon black peppercorns

The first thing to do is to butcher the ducks. Remove the leg/thigh portion, wings, breasts, and any giblets. Trim all of the fat and skin from the carcass.

Pack up the breasts and giblets to use another day. All we are interested in is the fat, leg/thigh, and wings. Also, save the trimmed carcass to make duck stock. Nothing is wasted in French Cuisine!

Place all of the trimmed fat and skin into a large pot. Add cold water to cover and bring to a boil. We are rendering the fat and the water will help in this process. After all of the water evaporates, you will be left with pure fat. Lower the heat to medium and continue to cook until the skin pieces begin to turn brown. Let them get golden and crispy. Turn off heat, allow to cool for 20 minutes, and drain off fat. Be Careful, the fat is still quite hot. Put fat into a bowl and refrigerate. Save the duck cracklings, they are great in salads or with eggs. Nothing is wasted in French Cuisine!

While the fat is rendering, place the leg/thigh pieces and wings into a nonreactive container. Sprinkle with the salt, and add the seasonings. Mix together. Refrigerate overnight.

The next day, remove duck pieces and fat from the refrigerator. Place fat into a large pot being careful not to scrape in any of the liquid or sediment that may be at the bottom of the bowl. Place fat over low heat to melt.

Rinse duck pieces under running water to remove the salt and seasonings. Pat very dry with paper towels. Place duck into melted fat and increase heat until fat begins to just simmer. Maintain the fat at this gentle simmer. Cook the duck for 2 to 3 hours depending on how large the pieces are and how tough the duck.

To check if the duck is ready, poke with a thin knife or a skewer. If the knife goes in easily and the meat seems meltingly tender, the duck is ready. Be careful not to overcook or the duck will fall apart into the fat.

Transfer the duck pieces to a storage container and strain the fat over. The confit may now be used in your recipes, or enjoyed by itself . Confit begins to develop its full flavor character after about 1 month of storage.

Tuesday, September 23, 2008

Persian Tomato and Basmati Rice Soup

This is the ultimate tomato and rice soup. The fragrant spices and exotic ingredients will fill your kitchen with intrigue. This is a variation of the soup that I made for the Rethinking Soup program at the Jane Addams Hull House in Chicago. I also made the Harira recipe below. It was a great time, lots of eager soup eaters who are interested in the world around them. All are welcome at these events. There is free soup and lively "Organic" discussion. Donations are gladly accepted! If you find yourself in the great city of Chicago, stop by on any Tuesday between 12:00 Noon and 1:30. The combination of history, soup, and current organic food trends makes this a worthwhile lunchtime event.

Persian Tomato and Basmati Rice Soup
2 tablespoons olive oil or ghee
3/4 cup carrots, diced small
3/4 cup celery, diced small
1 onion, chopped
1 cup Basmati Rice
4 to 5 cups water or chicken stock
3 cups fresh tomatoes, chopped
1 tablespoon allspice
1 tablespoon coriander
1/2 cup cilantro, chopped
1/4 cup dill, chopped
1 Persian dried lime*
salt and pepper

Place oil or ghee into large pot over medium-high heat. Add carrots,celery,and onion. Saute for 5 minutes until the vegetables soften. Add the rice, tomatoes, liquid, and spices, and dried lime. Bring to a boil, reduce heat to medium-low, cover, and simmer gently for 1 hour, stirring occasionally.

After 1 hour, add cilantro and dill. Season to taste with salt and pepper. Serve in bowls.
This soup will thicken as it sits, so you may need to add more liquid from time to time.

* Dried limes can be found in Persian specialty stores or on-line.

Harira - Feeding The Soul of North Africa

One of the greatest soups in the world is the North African Harira. This soup, popular in Morocco and Algeria, is served at the break- fast meal in the evening during the Islamic Month of Ramadan. A hearty meal in itself, it soothes the body and nourishes the soul after many hours of intense fasting. Harira is also served for weddings, and other important family occasions.

There are many variations of this soup, but it basically consists of lamb, chick peas, lentils, onions, tomatoes, pasta or rice, and a multitude of fragrant spices. It is truly unique, and a soup worth exploring. Just one sniff of the fragrantly spicy pot will transport you to the streets of Morocco.

Harira
2 tablespoons olive oil or butter
1 pound lamb shoulder, cubed
3/4 cup carrots, diced
3/4 cup celery, chopped
1 yellow onion, chopped
1 red onion, chopped
2 pounds fresh tomatoes, roughly chopped
1 cup green lentils
1 pound soaked chick peas, or 1 15 ounce can chick peas
4 ounces vermicelli pasta, broken into small pieces
1 teaspoon turmeric
1 1/2 teaspoons black pepper
1 teaspoon ground cinnamon
1/4 teaspoon ground ginger
1/4 teaspoon cayenne pepper
7 cups water
1 bunch cilantro, chopped
1 bunch flat leaf parsley, chopped
juice of 1 lemon
2 large eggs, beaten
salt to taste
lemon slices for garnish

Place oil or butter, lamb, spices, carrots, celery, onions, and tomatoes into a large pot over medium-low heat. Stir for about 5 minutes, and then let simmer for 15 minutes.

Add water, lentils, and chick peas to the pot. Bring to a boil, then reduce heat to simmer and allow the soup to gently simmer covered for 2 hours.

About 15 minutes before serving, turn heat to medium-high and add the pasta or rice. Allow the soup to simmer for 15 minutes, or until the pasta or rice is cooked. Just before serving, add salt to taste, and add the lemon juice, beaten eggs, cilantro, and parsley. Mix thoroughly. Ladle into bowls, and garnish with lemon slice.

Monday, September 15, 2008

Torta di Mele e Mandorle all'Olio


We are heavily into apple season here in the Midwest. It is one of my favorite times of year to cook. The local farmers' markets are teaming with a multitude of great produce, but the apples are really starting to stand out. It is amazing to see the variety that is available to the Chef. We are no longer constrained by the usual mass-market options. Heirlooms rule at the farmers' market. The shapes, sizes, colors, and names just make you smile.

One apple that I look forward to every year is the Honeycrisp. It seems to be a perfect package. It is tart, sweet, and crisp yet yielding. They are a great option for baking. They make an incredible pie that is tender and heavily perfumed with the purest essence of APPLE. After I have made my quota of yearly apple pies, I like to find other ways to use this apple. One of my favorite recipes is an Italian Apple and Almond Cake that is made with Extra Virgin Olive Oil. This recipe is my variation of the Italian classic. If you haven't used olive oil in your baking, you must try this recipe. It will transport you to the mountains of Italy where Grandmothers have been baking variations of this cake for centuries. You must plan ahead a little, as this cake is better if allowed to rest for a day before serving.

Torta di Mele e Mandorle all'Olio
3/4 cup raisins
1/4 cup rum
2/3 cup extra virgin olive oil
1 cup light brown sugar
3 large eggs
1 tablespoon apple cider vinegar
1 teaspoon vanilla
1 teaspoon almond extract
2 1/3 cups all-purpose flour
1/2 cup almond flour
1 teaspoon cinnamon
1 1/2 teaspoons baking soda
1/2 teaspoon sea salt
1 pound Honeycrisp apples, diced small
1/2 cup sliced almonds
1/4 cup powdered sugar

Place oven rack in center of the oven. Preheat oven to 350 degrees. Grease an 8 inch spring-form pan.

Place raisins and rum in small bowl and let sit for 20 minutes.

Place oil and sugar together in the bowl of a standing mixer. Beat with paddle attachment until just combined. Increase speed to medium and begin to add the eggs, one at a time. Scrape the sides of the bowl after each egg. Continue beating, the mixture should have the consistency of mayonnaise. Add the vinegar, vanilla, and almond extract. Mix thoroughly.

In another bowl combine the flour, almond flour, cinnamon, baking soda, and salt. Mix together with a whisk until evenly blended.
With mixer on low, add dry ingredients to oil mixture. When almost combined, add apples and raisins, with the rum. Blend thoroughly, it is OK if some of the apple gets smashed by the beater.

Spread batter into prepared pan. Smooth surface and top with sliced almonds. Gently press almonds into surface so that they all stick to the cake. Bake for 1 hour. Test doneness with a wooden skewer, it should come out clean. If not, continue cooking in 5 minute intervals until done.

Remove from oven and cool on a rack for 10 minutes. Remove the collar from the pan and cool the cake completely. Once cool, wrap loosely and allow to sit for 1 day. This will help the cake to develop deeper flavor. Before serving, liberally dust the top of the cake with powdered sugar.

Serve the cake with strong coffee, tea, or as the Italians do, a glass of Vin Santo.

Sunday, September 7, 2008

Ful Mudammas - Egypt's National Dish


I have grown tired of the usual American breakfast fare. Eggs and bacon are great, and who doesn't love a good pancake? But let's face it, it's boring...

Sure, you can vary things. You can have oatmeal, farina, cold soggy cereal, sugary, fat-laden pastries, blimp- sized bagels, or a multitude of twigs, bark, and berries. All of these are commonplace, but even more boring. If breakfast is the most important meal of the day, why is it the least creative or exciting of the day's meals? I know that most Americans are very busy in the morning. We try to steal as much sleep as we can and then fly out the door for work. Who has time to be creative when your train is leaving in 20 minutes? There must be an interesting breakfast alternative that doesn't require a lot of morning preparation? There is!

Lately I have been eating breakfast the way the Egyptians do. I have Ful Mudammas. It is a simple preparation of small, dried fava beans, red lentils, onion, and tomato. This may not sound very interesting, but trust me, it is. The basic Ful is just a healthy, fiber-rich catalyst. The real magic is in the multitude of condiments that can be served with the Ful. I start my mornings with hot sauce, olive oil, and tahina. Sometimes I go for the fried egg option with kashk and sumac. Even a simple drizzle of salted butter raises the Ful to new levels of good!

Ful not only gets your tongue dancing, it is healthy, and will stick with you for most of the day. It is like throwing a big log on your metabolic fire. No quick burn and crash here, this stuff keeps you going strong. 80 million+ Egyptians can't be wrong!

Preparing Ful requires some planning. The beans must be soaked for 24 hours. The dish itself needs to cook for 12 hours. The good news is that you can make it in a slow cooker overnight. Then it is ready by breakfast time. Once made, the Ful can be stored in the refrigerator for up to a week, and reheated in the microwave as needed. The longer it sits, the better it gets!

Here is the recipe that I use. It is very traditional, but with a few personal touches. This recipe will make quite a large batch, so feel free to cut it in half if you need to.

Ful Muddamas

3 pounds small dried fava beans*, soaked overnight in the refrigerator

1 cup red lentils, rinsed

1 onion, chopped

2 tomatoes, chopped

2 1/2 quarts vegetable stock or water

1 tablespoon hot sauce (your favorite, optional)

1 tablespoon kosher salt (optional, traditionally Ful is not salted until served)


Place all ingredients into a slow cooker. Cook on High for 2 hours. Turn temperature down to low and cook for 10 hours. After 12 hours, check consistency. Ful should not be too thick. Add more liquid to make more "soupy". Serve in a bowl with your favorite condiments and plenty of whole grain flat-breads.

If you do not have a slow cooker, start Ful on top of stove in a heavy pot. Bring to a boil, cover, and place in a 200 degree oven for 12 hours.

Here are some of the traditional garnishes for Ful Mudammas, but feel free to try your own:

hot sauce, olive oil, tahina, hummus, tomato sauce, kashk, butter, garlic sauce, fried egg, hard-cooked egg, chick peas, green onions, and sumac.

* Small fava beans can be found in most Arab or Persian stores, or on-line.

In a pinch, you can substitute regular, brown lentils. This of course is not traditional, and probably will ruffle some purist feathers.


Sunday, August 31, 2008

Wild Yeast Sourdough Bread


OK - So you've made your Seed Starter and your Barm. It's been sitting in your refrigerator for days. You have been caring for it, feeding it, and thinking about it while at work. Your friends have come over, you proudly show it to them, and they are worried about you. So just what are you going to do with this smelly, bubbling bowl of attitude?

You are going to use it to bake an incredible loaf of Sourdough Bread, of course!

Here is a recipe for a very basic Sourdough Bread that exclusively uses your Barm for leavening. The results are delicious, but this is not the big, tart, San Francisco Sourdough that you may be expecting. The flavor of this bread is not sour at all. It takes years for a Barm or Starter to develop the flavor that we usually associate with a loaf of Sourdough. Sadly, today most "Sourdoughs" are soured by adding citric or ascorbic acid. Read the labels.

This bread is rich and earthy, with an incredibly "creamy" texture. The crust is crispy and chewy. It will become your new favorite against which all other "white" breads are judged.

Patience is the key when working with this kind of a Starter. It does not work as fast as commercial yeast, and if you try to rush it, your results will be disappointing.

This recipe is adapted from The Bread Baker's Apprentice.

To make two 1 1/2 pound loaves
Starter:
2/3 cup Barm
1 cup unbleached high-gluten or bread flour
1/8 to 1/4 cup pure water
Dough:
4 1/2 cups unbleached high-gluten or bread flour
2 teaspoons sea salt or kosher salt
1 1/2 to 1 3/4 cups lukewarm, pure water

Semolina or cornmeal for dusting

Combine the ingredients for the starter, adding only enough of the water to form a dough that can be kneaded into a smooth ball. Lightly oil a small bowl or a bag, place ball of dough within, cover, and let rest at room temperature for 4 to 6 hours. After this time, the dough should have doubled in size.

Place the starter into the bowl of a standing mixer, add 1 1/2 cups of water and the salt. Mix with the paddle attachment until well combined and smooth. Switch to the dough hook and add the flour. Mix on low speed with the dough hook until the dough begins to come together. If the dough appears dry, add the remaining water. If still dry, add more water 1 tablespoon at a time until dough comes together and is smooth and no longer sticking to the bowl. Increase the speed of the mixer to medium-high and knead the dough for about 10 minutes. You should hear a "slapping" sound as the dough is kneading.

Remove dough from mixer and ferment in the mixer bowl, covered, or in an oiled bag for 3 to 4 hours. Dough may also be fermented in the refrigerator overnight.

After this fermentation, remove dough from its container and gently knead on a lightly floured counter. Dough may now be formed into rounds, batards, or whatever shape you would like. Once dough is formed, allow it to ferment again in a floured banneton, or on a semolina or cornmeal dusted baker's peel, or a flat sheet pan. Be sure to cover dough with a clean cloth, and if fermenting on a peel or sheet pan, lightly oil the surface before covering. The dough should proof for 2 to 3 more hours. If dough was fermented in the refrigerator, this could take 4 to 6 hours.

While the dough is undergoing its final fermentation, prepare the oven. Place racks at highest and lowest levels. On lower rack place a baking stone. On the higher rack place a heavy, metal pan that can be used to create steam. Heat oven to 500 degrees.

After fermentation is complete and the oven is ready, slash the top of a round loaf in a tic-tac-toe pattern. Slash batards three times diagonally. Slide loaves onto hot stone, add 2 cups water to steam pan, and close the oven door. After 30 seconds, spray sides of oven with water from a mist sprayer. Close the door. Repeat 2 more times at 30 second intervals. After final spray, lower oven temperature to 450 degrees. Bake for 10 minutes. Rotate loaves 180 degrees, and bake for another 15 to 20 minutes, or until done. The loaves should be a rich, golden brown, and should sound hollow when thumped on the bottom.

Transfer to a cooling rack and allow to cool for at least 1 hour before serving.
If you cut into it too soon, the bread will be ruined.

Friday, August 22, 2008

Food Trends: Salty Is The New Sweet


As a Private Chef I am responsible for all of the components of a meal, from first courses to desserts. The family that I work for loves desserts and little sweets that can be nibbled throughout the day. Luckily, I am strongly cross-trained in both savory preparations and pastry. I try to stay on top of all of the latest food trends, not easy in this fast paced world...

One of my favorite new trends is the pronounced presence of salt in sweet preparations. It seems like all of the top French Pastry Chefs are putting French Sea Salt into everything. There is something magical about this combination. The sweet tastes sweeter, and the salt lingers on the palate, tempting you to take another bite. These French Chefs are even baking and making candies with, dare I say it, SALTED BUTTER! You know, the butter we're not even supposed to think about using in our recipes. The master, Pierre Herme, makes caramels using the forbidden, "second rate" ingredient. The result... The BEST caramel that you have ever tasted!

When baking with salt it is important to use only the best. We are looking for the purest salt flavor without any funny aftertaste. The French are of course using Fleur de Sel and Sel Gris, but there are a number of fancy sea salts on the market today. Each salt is unique as they all have different mineral contents. Experiment with different options until you find your favorite. Just remember, the larger the crystal, the less it will dissolve in your preparations.

Commercial table salt is not a good option as it contains multiple ingredients to make it "flow". These ingredients impart strange flavors. Don't use it. EVER! FOR ANYTHING!

Back in July, the New York Times published a recipe for the best Chocolate Chip Cookie in New York. The best cookie in New York is French! The recipe was created by Jacques Torres, one of the world's best French Pastry Chefs. The recipe is loaded with French Sea Salt, and the results are wonderful. You can get the recipe from the NY Times, but by now it is all over the web.

The following Chocolate Chip Recipe is the one that I have been using for years with the addition of Fleur de Sel. The original recipe was good, but this one rocks. Try it!


Chocolate Chip Cookies

1 1/2 sticks of softened UNsalted butter (I know)
1 cup dark brown sugar
1/2 cup white sugar
1 whole egg, large
2 egg yolks, large
2 teaspoons Madagascar vanilla extract
2 1/4 cups unbleached all-purpose flour
1/2 teaspoon baking powder
1 teaspoon Fleur de Sel
2 cups best quality bittersweet chocolate chips

Position oven racks to center of oven. Preheat oven to 325 degrees for at least 1 hour. Line 3 baking sheets with parchment or use a Silpat.

Mix flour, baking powder, and salt together using a whisk.

Using a mixer, cream butter and sugars together until light and fluffy. Scrape down the sides of the bowl to be sure that they are well blended. Add the whole egg and mix together, scraping the sides. Then add the yolks, one at a time, until blended. Add the vanilla.

Scrape sides again and add the flour mixture. Blend on low speed until just about incorporated. Finally, add the chocolate chips and blend until just incorporated and no more dry flour is visible. Allow dough to rest in refrigerator for at least 1 hour, but overnight is better to develop deeper flavor.

After dough has rested, scoop out scant 1/4 cup portions of dough and roughly form balls in your hands. Don't make them too smooth, the rough texture makes a better looking finished product. Place 6 portions per pan and bake for 18 to 20 minutes. For best results, bake only 1 pan at a time. When finished, remove cookies from pan using a spatula, and place on a cooling rack. Repeat with remaining pans. ENJOY!

Note: Fleur de Sel can be obtained at most specialty food stores, or from The Spice House.

Monday, August 18, 2008

Wild Yeast Starter

I love bread!

I love everything about it. The way it smells, the way it tastes, the way it looks, the way the dough feels in my hands, and the sound of the crunchy crust. I have been baking bread for years, ever since I was a child. Recently I have been baking bread using a Wild Yeast Starter, instead of commercial yeast. The results have been absolutely incredible. The bread looks better, smells better, and tastes better! I have used it in all of my baking recipes, from croissants to Miche. Of course the recipes have to be modified a bit to compensate for the extra moisture and flour contained in the starter, but that is part of the adventure. The final products are ethereal, almost too good to be true. The starter, also known as a Barm, is an amazing addition to any serious baker's repertoire. The following recipe is based on the recipe in The Bread Baker's Apprentice. It doesn't seem like it is going to work at first, but then something amazing happens. It's Alive, It's Alive!!!


First make a Seed Starter:

1 cup rye flour (I prefer dark rye)
1/2 cup pure water (bottled)

Mix together, place in a small bowl, cover with plastic, and let sit at room temperature for 24 hours.

After 24 hours, add:

1 cup bread or high gluten flour
1/2 cup pure water

Mix into rye dough, incorporate completely, cover, let sit for 24 hours.

On days 3 and 4, proceed as on day 2.

After the 4th day, seed starter should be bubbly and active. Don't be put off by the smell, it's natural.


To make the Barm:

1 cup seed starter (give leftover seed starter to an understanding friend)
1 cup bread or high gluten flour
1/2 cup pure water

Mix together, cover, let stand at room temperature for 4 to 6 hours. Then refrigerate overnight.
Barm should be bubbly and active, and have an almost sour cream smell.
If it is still not active, leave out at room temperature for another 24 hours.
The Barm is now ready to use.
I use 3/4 cup of Barm per recipe, and increase flour slightly to compensate for extra moisture.
There are great recipes in The Bread Baker's Apprentice.

I shall also be posting some of my recipes in the future, so there is time to get your Barm going. It develops better flavor with age!


Caring for a Barm:

Barms should be kept in the refrigerator until ready for use.
They should also be "fed" every few days with 1 cup bread flour and 1/2 cup pure water.
Feel free to give extra Barm to those special friends that are impossible to shop for!
It's a gift that they won't soon forget.

Friday, August 15, 2008

She Taught A City To Eat Locally


It was with heavy heart that the Chicago Culinary Community and supporters of the Chicago Green Market learned of the passing of Abby Mandel. Abby was the founding President and enthusiastic voice of the Chicago Green Market. She died Wednesday morning after an heroic battle with illness. She founded Chicago's Green Market 10 years ago and worked tirelessly to make it the overwhelming success that it is today. She taught this city to eat locally, to know our food, and to know our farmer. Thank-you, Abby. Your Market lives on! Thank-you. Chicago will miss you.

Thursday, August 14, 2008

Everybody Loves Dumplings!


It is mind-boggling to think of all of the different Dumplings in the world! It seems like every culture has some form of these little bundles of joy. They range from savory to sweet, large to small, baked to boiled, steamed to fried... One thing they all have in common is that people go nuts for them! I love Dumplings, and as a Private Chef I have the chance to sample recipes as often as I like. When writing menus, I always try to include some form of Dumpling. They are always well received.

The Republic of Georgia has been in the news a lot lately. The following recipe is for Georgian Dumplings called Khinkali. They are beautiful little boiled bundles of caraway spiced meat that are traditionally served with yogurt.

Dough:
3 cups all-purpose flour
1 cup boiling water
1/2 teaspoon sea salt

This is best prepared in a food processor because the dough is hot! Put flour and salt in the bowl of a food processor, turn on, and add boiling water until dough comes together. You may not need all of the water. Turn out on board and give a couple of turns by hand, adding flour as needed to prevent sticking. Dough should be soft and pliable, not sticky or dry. Wrap and let rest while preparing the filling.

Filling:
1/2 pound ground pork
1/2 pound ground beef chuck
1 cup grated onion
1 teaspoon sea salt
1 teaspoon Aleppo chile pepper
1 teaspoon toasted caraway seeds, crushed

Simply mix all of the ingredients together in a large bowl.

To make the Dumplings:
Roll out dough on floured surface to about 1/8 inch thick. Use a 3 inch round cutter to cut out circles. Place about 1 tablespoon of filling on each circle and bring edges up until they meet at the top. Squeeze together and give a little twist. Place dumplings on a lightly oiled tray. They can be frozen at this point.

To cook:
Bring a large pot of water to a boil. Add 1 tablespoon of salt. Add dumplings about six at a time. When water boils again, reduce heat to a gentle simmer. Cook dumplings about 5 to 7 minutes. They should float when they are done. Remove from boiling water with strainer and place on buttered dish. Bring water back to a boil and proceed with remaining dumplings.
Serve hot with yogurt and a sprinkle of parsley.

To serve:
2 tablespoons butter
2 tablespoons chopped parsley
1/2 cup Greek-style yogurt

Recipe makes about 18 Dumplings.

Note: Aleppo chiles can be obtained from The Spice House.

Friday, August 8, 2008

Momos - Tibetan Dumplings


Today is 8/8/08, the opening of the Olympic Games in Beijing, China. To mark this momentous occasion for the people of the world I offer this recipe for the traditional Tibetan Dumplings called Momos. These are incredibly succulent and addictive. If you make them, be prepared to be a very popular person.
So why Tibetan dumplings? Is this a political site? The answer is simple. As the world comes together to celebrate China, we must remember that China is made up of many ethnic minorities. Each one of these peoples contributes to the beauty of this mysterious nation.


Tibetan Dumplings (Momos)

Dough:
2 cups organic all-purpose flour
1/2 teaspoon Himalayan salt
1/2 cup warm water (about)

Filling:

1 pound ground lamb shoulder
2 teaspoons Asian chili sauce (I like Sambal)
5 scallions, chopped
1/2 cup cilantro, chopped
2 tablespoons ginger, grated
1 1/2 teaspoons Himalayan salt
3/4 teaspoons ground black pepper

To make the dough, mix flour and salt together. Add enough water to make a firm but not dry dough. Knead until smooth. Cover and let rest for 1 hour.

While the dough is resting, make the filling. Just mix all of the ingredients together in a bowl.

Divide dough into 24 equal pieces. Roll into 4-inch circles. Place about 1 tablespoon of filling in the center of of each circle and pull up the sides until they meet at the top. Squeeze together and give a little twist. Continue procedure until all dumplings are filled. Keep finished dumplings loosely covered so they don't dry out.

To cook:

These dumplings are traditionally steamed, but they are also great fried.

To steam, oil a steamer basket and arrange dumplings so they are not touching each other. Cover steamer basket. Steam over boiling water about 15 minutes. Continue cooking in batches until all dumplings have been steamed.

To fry, heat a large pot with about 3 inches of vegetable oil to 350 degrees. Fry the dumplings in batches until they are golden brown. Remove from oil and drain on paper towels.

Serve either steamed or fried dumplings with your favorite dipping sauce. ENJOY!

Serves 6 to 8 people.